
Commercial developers chase speed to revenue, but a rushed roof installation kills schedules faster than anything else. A Preflex SIP Roof delivers the thermal performance and air tightness you need, but only if you handle the lifting, taping, and spline connections with surgical precision. You cannot afford the moisture infiltration risks that come from improper sealing or the code failures that arise from ignoring thermal barriers.
Our manufacturing specifications range from 4 5/8 inches to 12 ¼ inches thick, and handling that span of structural foam requires precise lifting strategies to maintain warranty integrity. You will find the exact engineering steps required before you order, critical safety protocols for site prep, and the specific lifting techniques needed to position large-format panels without damaging the edges. The result is a code-compliant, weather-tight envelope that lets you move to interior finishes without fear of callbacks.
What Are Preflex SIP Roof Panels?
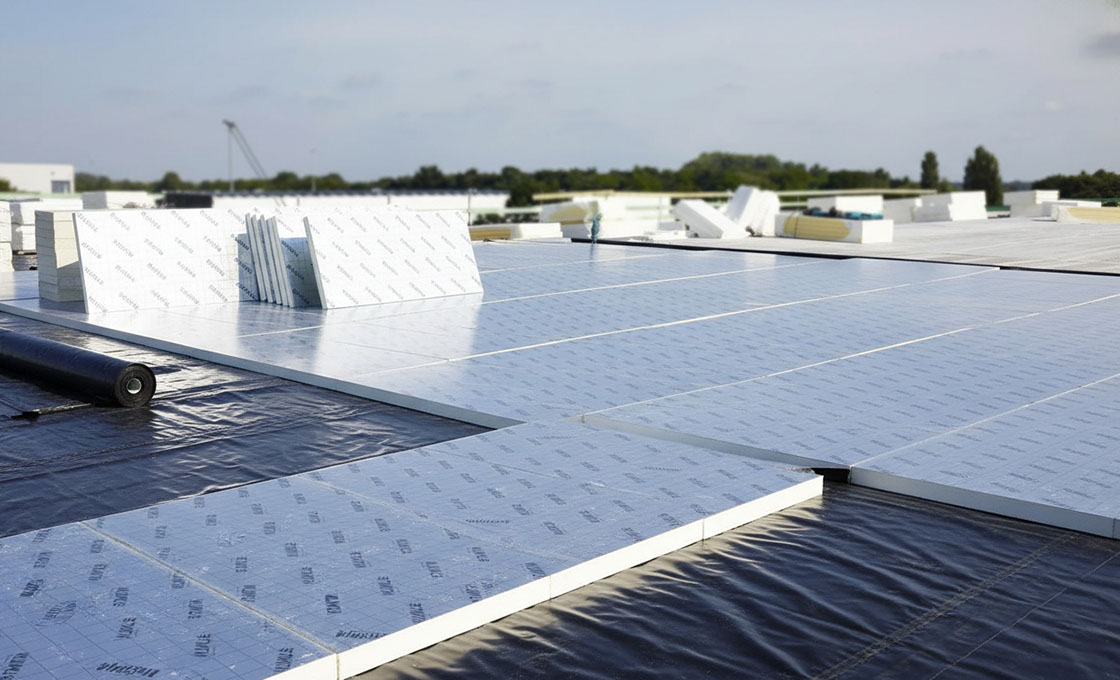
Preflex SIP roof panels are precision-engineered, factory-fabricated structural insulated panels that combine high-strength composite facings with a rigid foam core into a single load-bearing assembly—delivering superior thermal performance, faster on-site installation, and consistent quality control that traditional stick framing cannot match.
GRP and CFRT Facing Material Properties
The facing materials in SIP roof panels form the structural skin that transfers loads across the panel and protects the foam core from environmental exposure. Glass Reinforced Plastic (GRP) and Continuous Fiberglass Reinforced Thermoplastic (CFRT) are two of the most widely specified facing options, and each brings distinct mechanical and chemical advantages to the assembly.
GRP facings are composed of a polyester resin matrix reinforced with woven fiberglass mats, producing a rigid, high-strength surface that resists deformation under sustained loads. These panels maintain dimensional stability across a wide temperature range, which is critical for roof applications where thermal expansion and contraction can compromise joint integrity over time. GRP also offers excellent resistance to moisture absorption, meaning the facing itself will not degrade or soften when exposed to incidental water during construction or service life.
CFRT facings represent a newer generation of composite skin, utilizing thermoplastic polymers reinforced with continuous fiberglass strands rather than the thermoset resins used in GRP. This difference in material chemistry gives CFRT a higher elongation capacity before failure, which translates to better impact resistance and improved ability to absorb handling stresses during transport and installation. CFRT also bonds more effectively with certain adhesive systems, creating a stronger interface between the facing and the foam core during the lamination process.
- GRP Advantage: Superior stiffness and load-bearing capacity for long-span roof applications where deflection control is critical.
- CFRT Advantage: Higher impact resistance and better adhesive bonding compatibility, reducing the risk of facing delamination during rough handling.
- Both Materials: Provide a non-corrosive, weather-resistant barrier that eliminates the rot and insect damage risks associated with traditional wood sheathing.
Structural Foam Core Options: XPS vs PET
The foam core is the functional heart of a SIP roof panel, providing the thermal resistance and shear stability that allow the panel to act as both an insulator and a structural diaphragm. XPS (extruded polystyrene) and PET (polyethylene terephthalate) foam are two core materials that dominate the market, and selecting between them requires understanding their thermal behavior, moisture response, and structural characteristics.
XPS cores are manufactured through an extrusion process that creates a closed-cell structure with uniformly distributed cells and a characteristic blue or pink coloration. This closed-cell architecture gives XPS one of the highest R-values per inch among common insulation materials, along with exceptional compressive strength that allows the panel to carry dead and live loads without core compression or settlement over time. XPS also has very low water vapor permeability, which makes it highly resistant to moisture ingress—a significant advantage in roof assemblies where condensation management is a primary concern.
PET foam cores are produced from recycled polyester materials and offer a compelling sustainability profile without sacrificing structural performance. PET cores deliver thermal resistance that is competitive with XPS, though typically at a slightly lower R-value per inch. The key differentiator for PET is its open-cell structure in some formulations, which allows limited moisture vapor transmission through the core itself. This characteristic can be advantageous in certain climate zones where a panel that allows the assembly to dry inward is preferable, but it requires careful coordination with vapor barrier specifications to avoid trapping moisture within the roof cavity.
- XPS Cores: Higher R-value per inch, superior compressive strength, and near-zero vapor permeability—ideal for cold climates and assemblies where moisture resistance is paramount.
- PET Cores: Strong sustainability credentials, competitive thermal performance, and variable vapor permeability that can support drying-oriented assembly strategies when specified correctly.
- Both Cores: Provide a continuous insulation layer that eliminates thermal bridging through framing members, directly reducing the heating and cooling loads on the building.
Integrated Prefabricated Connection Systems
One of the defining advantages of Preflex SIP roof panels over conventional framing is the integrated connection system that is engineered and fabricated into the panel itself during production. These connection details—typically consisting of routed grooves, spline channels, and interlocking edge profiles—allow panels to be joined together on-site with minimal additional hardware while maintaining structural continuity across the entire roof deck.
The spline-based connection system is the most common approach, where matching male and female profiles are precision-cut into the panel edges during manufacturing. When two panels are brought together, the splines interlock to transfer shear forces and maintain alignment, creating a continuous load path that distributes roof loads across multiple panels rather than concentrating them at individual support points. This monolithic behavior is something that traditional stick framing cannot achieve without extensive additional engineering and on-site fabrication.
The prefabricated nature of these connections means that tolerances are controlled in the factory rather than on the job site. This is a significant quality advantage, as field-cut joints between conventional lumber members are inherently variable and dependent on the skill level of the installing crew. Factory-precision connection profiles ensure consistent panel-to-panel alignment, reduce the likelihood of gaps that could compromise air or water infiltration, and speed up installation because crews are assembling pre-engineered components rather than fabricating connections from scratch.
- Spline Interlock: Precision-routed male-female edges that transfer shear loads and maintain panel alignment without additional fasteners at the joint.
- Continuous Load Path: The integrated connection system creates a unified roof diaphragm that performs as a single structural unit rather than a collection of individual panels.
- Factory Tolerance Control: Connection profiles are cut to tight tolerances in the manufacturing environment, eliminating the variability and rework associated with field-fabricated joints.
| System Component | Material Composition | Primary Function | Technical Specification | Performance Benefit |
|---|---|---|---|---|
| Insulation Core | XPS, PET, PU, PVC Foam | Thermal resistance & shear stability | R-5.0 to R-6.5 per inch; 6-14 inch thickness configurations | Sustained thermal insulation; reduces HVAC capacity requirements |
| Structural Facings | GRP/FRP, CFRT, Aluminum, Steel, Plywood | Load distribution & weather barrier | High-strength composite skins; Waterproof and corrosion-resistant construction | Lightweight structural integrity; reliable performance under weather exposure |
| Monolithic Panel Assembly | Precision-engineered foam-core sandwich | Unified roof deck & insulation system | Air leakage target < 3 ACH50; Continuous load path via splines | Eliminates thermal bridging; streamlines construction schedule |

Why Choose SIP Roofing Over Traditional Framing
Structural insulated panels deliver up to 15 times better airtightness and faster on-site assembly than conventional stick framing, while significantly reducing dead load on supporting structures.
Thermal Performance vs Traditional Framing
The fundamental thermal advantage of structural insulated panels (SIPs) lies in their monolithic construction. Unlike traditional stick framing, where thermal bridging through wood or metal studs creates consistent heat loss pathways, SIPs provide a continuous insulation layer across the entire roof plane. Wood framing typically delivers an R-value of approximately 1 per inch of thickness, whereas EPS foam cores achieve roughly 4 R-values per inch, XPS cores deliver around 5 R-values per inch, and PET foam cores offer approximately 4.3 R-values per inch.
In practice, a 6-inch SIP roof panel with EPS core achieves an effective R-value near R-24, while the same thickness in traditional framing—with insulation batts between 2×8 studs—achieves only about R-16 to R-18 due to the thermal bridging effect of the framing members occupying roughly 25% of the assembly depth. This gap widens in colder climates where energy codes increasingly demand higher continuous insulation values.
The airtightness advantage compounds the thermal benefit. SIP constructions can achieve up to 15 times lower air leakage rates than conventional framed assemblies. This reduction in uncontrolled air infiltration means heating and cooling loads are significantly diminished, and the risk of interstitial condensation within the roof assembly—a leading cause of hidden structural deterioration—is substantially mitigated. The GRP and CFRT facing materials used in modern SIPs also contribute to the overall envelope integrity by forming a continuous weather and vapor-resistant barrier.
- Thermal bridging elimination: Continuous insulation core removes the conductive paths inherent in wood or steel stud spacing.
- Airtightness: SIP assemblies can achieve up to 15× lower air leakage compared to stick-framed roofs.
- R-value per inch: EPS (~4 per inch), XPS (~5 per inch), and PET (~4.3 per inch) all outperform wood framing (~1 per inch).
- Condensation control: Reduced air infiltration minimizes moisture migration into the roof cavity.
On-Site Assembly Efficiency Gains
SIP roof panels are manufactured as complete structural assemblies—combining the insulation core, structural facings, and often integrated connection details—in a controlled factory environment. This prefabrication shifts the majority of labor from unpredictable on-site conditions to precision manufacturing, where tolerances are tighter, material waste is minimized, and quality is consistent panel by panel.
On a typical residential or light commercial project, a SIP roof can be dried in within one to two days, compared to three to five days for a conventional framed and sheathed roof assembly. The integrated prefabricated connection systems further reduce on-site fabrication time, as panel-to-panel and panel-to-wall interfaces are designed and pre-engineered before manufacture. This eliminates the on-site measuring, cutting, and fitting that traditionally introduces errors and rework.
From a scheduling perspective, the acceleration of the roof enclosure directly compresses the critical path for subsequent trades—mechanical, electrical, drywall, and interior finishes can begin earlier. For general contractors managing multiple projects, this predictability reduces schedule risk and allows for tighter coordination of subcontractor sequencing. The reduced on-site labor also means lower exposure to weather-related delays during the most critical enclosure phase.
- Dry-in timeline: SIP roofs typically achieve weather enclosure in 1–2 days versus 3–5 days for stick framing.
- Integrated connections: Factory-engineered joint systems eliminate on-site custom fabrication.
- Critical path compression: Earlier roof enclosure allows trades to begin work sooner.
- Weather risk reduction: Less on-site work during the enclosure phase means fewer delays from adverse conditions.
Weight Reduction for Supporting Structures
SIP roof panels offer a meaningful dead load advantage over conventional roof assemblies. A typical SIP roof panel with EPS core and GRP or CFRT facings weighs approximately 12 to 18 pounds per square foot, depending on panel thickness and facing material. By comparison, a traditional framed roof with OSB sheathing, asphalt shingles, and batt insulation typically ranges from 14 to 20 pounds per square foot, with the heavier end of that range occurring in areas requiring thicker insulation or additional sheathing layers for code compliance.
This weight differential may appear modest on a per-square-foot basis, but it accumulates across the entire roof area and directly impacts the design and cost of supporting structural elements. Lighter roof loads allow for reduced member sizes in trusses or joists, lighter wall framing, and smaller foundation requirements. For projects involving roof retrofits or additions to existing structures, the reduced dead load can be the deciding factor in whether the existing structure can safely support the new roof without costly reinforcement.
The structural efficiency of SIPs also extends to span capability. Engineered SIP roof panels can span greater distances between supporting walls or beams compared to conventional rafters of equivalent depth, which provides design flexibility for open-plan layouts and reduces the number of interior load-bearing walls required. This is particularly relevant for projects where exposed beam aesthetics are desired, as the longer spans can accommodate wider bay spacing while still allowing for architectural expression of the structural system.
- Dead load range: SIP roof panels typically weigh 12–18 psf versus 14–20 psf for conventional framed assemblies.
- Structural savings: Reduced loads permit smaller framing members, lighter foundations, and lower material costs.
- Retrofit compatibility: Lower dead load makes SIPs suitable for additions and replacements on existing structures.
- Span efficiency: SIPs can span greater distances between supports, enabling open layouts and fewer interior walls.
Long-Term Structural Safety and Durability
A common concern among specifiers and homeowners is the long-term structural integrity of SIP roof assemblies. The GRP and CFRT facing materials provide high tensile and compressive strength, while the foam core—whether XPS, PET, or EPS—maintains its insulating and structural properties over the life of the building when properly sealed and protected from sustained water intrusion. Independent structural testing has demonstrated that SIP roof panels maintain their load-bearing capacity for decades under normal service conditions.
The monolithic nature of SIP construction also means there are no concealed cavities between framing members where moisture can accumulate undetected. In traditional framing, hidden leaks within wall or roof cavities can cause prolonged deterioration before they become visible. SIPs, with their continuous sealed envelope, make moisture intrusion more apparent and accessible, allowing for earlier detection and repair. This is a significant advantage for long-term building performance and occupant safety.
notably that the longevity of any SIP roof assembly depends on proper installation, particularly at panel joints and perimeter connections. The integrated prefabricated connection systems and recommended sealing tapes and adhesives are designed to maintain the envelope continuity over the building’s service life. When installed according to engineering specifications, SIP roofs have demonstrated durability that matches or exceeds conventional construction over multi-decade timelines.
- Material durability: GRP and CFRT facings resist degradation and maintain structural strength over decades.
- Moisture visibility: Continuous sealed envelope makes leaks more detectable than hidden cavity deterioration in stick framing.
- Installation dependency: Long-term performance relies on proper joint sealing and connection detail installation.
- Proven track record: SIP roofs have demonstrated multi-decade structural performance in field conditions.

Engineering and Code Steps Before You Order
Ordering SIP panels without verifying structural loads and fire compliance is the leading cause of project stoppages. You must lock in engineering calculations and code adherence before fabrication begins.
Defining Snow Load and Wind Uplift Parameters
Selecting a panel thickness based solely on R-value is a rookie mistake that compromises structural safety. Before you finalize your order, you must calculate the specific environmental loads acting on the building envelope. Snow load creates a “dead load” that compresses the panels and stresses the spline connections, while wind uplift creates a suction force that tries to peel the roof deck from the supporting structure. If the specified panel span or spline configuration cannot handle these vectors, you risk catastrophic deflection or joint separation.
It is critical to understand that the roof’s performance relies on a continuous load path. The panels transfer shear forces to the ridge beam and top plates, but only if the connections are engineered for the specific pitch and load. We have seen projects where the lifting points were not calculated for the roof pitch, leading to panel damage during installation. Ensure your engineering documents specify the exact placement of lifting hardware and the required fastener schedules to resist these forces.
Ensuring Compliance with Local Fire Codes
Fire code compliance is non-negotiable and varies significantly by jurisdiction and occupancy type. You must verify that the chosen core material meets the required flame spread and smoke development indices for your specific application. While many traditional SIPs use EPS or PUR, modern projects often require higher performance cores. The chemical composition of the foam dictates how it behaves under heat; some foams may require a thermal barrier, such as gypsum board, while others used in specific applications might have different ignition requirements.
Do not assume a “one-size-fits-all” approval. You need to confirm if the local Authority Having Jurisdiction (AHJ) requires an ICC-ES Evaluation Report (ESR) for the specific panel assembly. This is particularly crucial when integrating different facings, such as aluminum or FRP, which may alter the assembly’s fire rating compared to standard OSB-faced systems. Verifying these parameters during the planning phase prevents the costly nightmare of having to tear off installed cladding to add unauthorized fire barriers.
Reviewing Shop Drawings and Production Tolerances
The transition from CAD design to physical manufacturing is where errors often hide. You must rigorously review the shop drawings to confirm that production tolerances align with your field conditions. A common failure point is misalignment of pre-cut chases and openings. If the factory tolerance allows for minor deviations, but your on-site framing is rigid, you will face gaps that destroy the airtight seal. It is essential to coordinate the location of every wire run and plumbing penetration before the foam is laminated.
In our experience with large-scale commercial projects, the most successful installations are those where the general contractor challenges the manufacturer on spline fitment. Ensure the drawings explicitly detail the spline dimensions—whether they are dimensional lumber or engineered I-joists—and verify that the panel kerfs are cut to accommodate the specific spline material without forcing the fit. Forcing panels together to close gaps caused by tolerance stacking crushes the foam edges at the joints, compromising the insulation value and the air barrier immediately upon installation.
| Step | Key Consideration | Technical Parameter | Code/Standard Reference | Risk if Ignored |
|---|---|---|---|---|
| Determine Roof Pitch & Structural Load Requirements | Panel span capacity and lifting point placement | Minimum 1.5-inch bearing on ridge beam and wall plate; lifting hole positioned 9 inches from panel center for 7:12 pitch | ASTM D5455 / local structural code | Panel deflection, joint separation, or lifting failure during installation |
| Select Core Material by Climate Zone | R-value per inch and moisture resistance for your zone | EPS: R-3.6/inch | XPS: R-5.0/inch | PUR/PU: R-6.5/inch | PET: R-5.0/inch; Panel thickness options: 6, 8, 10, 12, 14 inch | IECC Climate Zone R-value requirements / IRC R806 | Failing energy code compliance or inadequate thermal performance in extreme climates |
| Verify OSB Facing & Structural Rating | Facing thickness and structural grade for load transfer | OSB facing: 7/16-inch or 15/32-inch structural panels; Must meet APA rated sheathing standards | APA ES2 Rating / IRC Section R602 | Reduced shear strength, panel delamination, or code violation at connections |
| Plan Joint Sealing & Air Barrier System | Butyl tape width, adhesive type, and seal continuity | Butyl-based SIP tape minimum 4-inch width at all panel interfaces; Fluid-applied membrane as alternative; Target air leakage: <3 ACH50 | ASTM E283 / IECC R402.4.1 air leakage | Air infiltration, condensation buildup, and mold risk within the assembly |
| Confirm Engineering Stamp & Design Review | Structural calculations for your specific project loads | Panel design must include engineered load path via internal splines (dimensional lumber or I-joist); Screw requirements: #10 or #12 x 3-inch structural screws at 12 inches O.C. at edges | ICC-ES ESR report / local AHJ approval | Structural failure at joints, failed inspection, or mandatory tear-out and replacement |
| Schedule Moisture Protection Protocol | Storage timeline and edge sealing before installation | OSB edges must be sealed or panels installed within 48 hours of delivery in humid climates; OSB swelling threshold: 2-4% moisture gain compromises spline fit | Manufacturer storage guidelines / ASTM D3227 | Panel swelling creates gaps at spline joints, compromising airtight seal and requiring field corrections |
| Coordinate Chase & Penetration Layout | Pre-planning for electrical, plumbing, and HVAC penetrations | Chase locations must be coordinated before panel fabrication; Avoid field-cutting structural splines; Maintain continuous vapor barrier continuity | IRC M1601 / MEP coordination requirements | Compromised structural integrity, vapor barrier breaks, and costly field modifications |
Safety and Site Prep Before Installation
Site Safety and Weather Preparedness
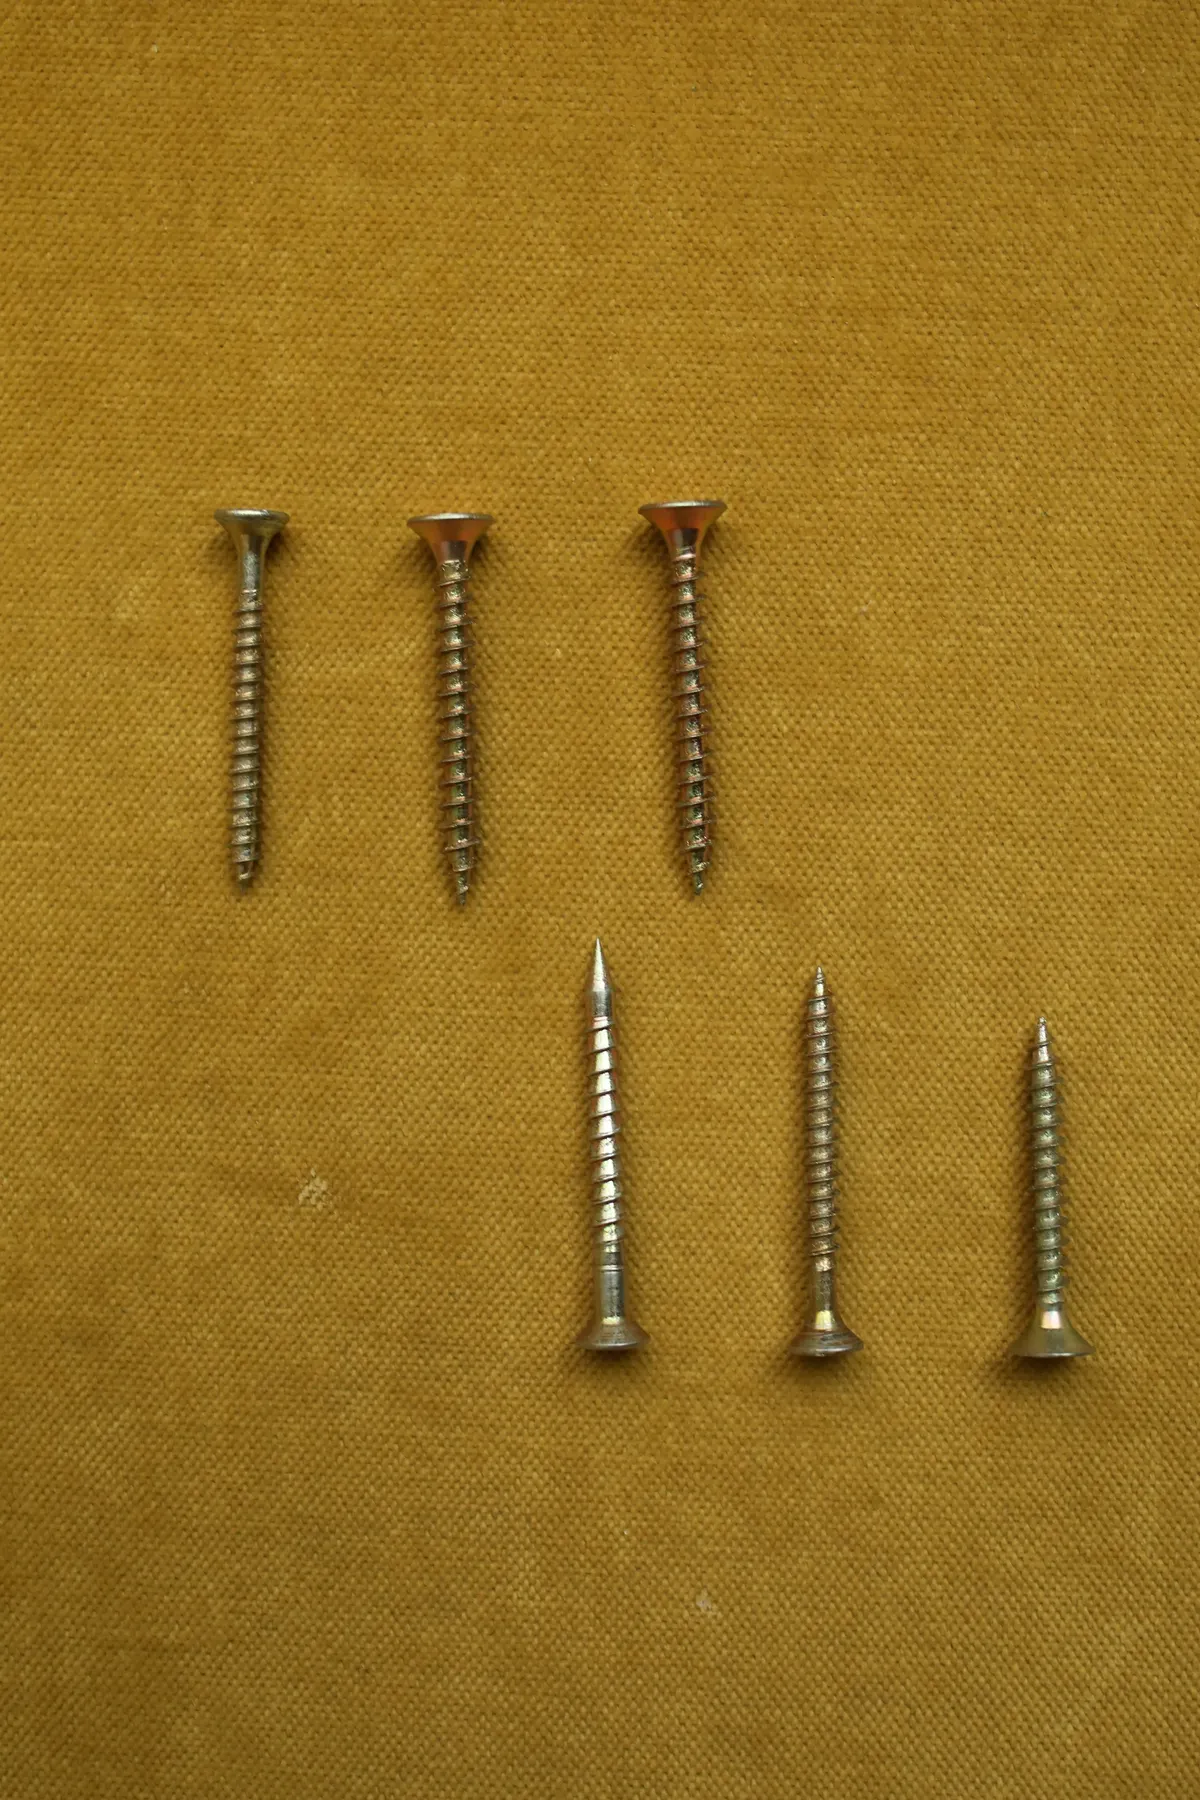
SIP roof installation fails at the site level long before the first panel is lifted. Proper storage, acclimation, and crew coordination prevent moisture damage, structural misalignment, and contractor delays that plague roughly 40% of SIP projects. General roofers unfamiliar with SIP systems are a leading cause of both defects and schedule overruns, making pre-installation site preparation the single most impactful phase for project success.
Before panels arrive on-site, the crew must establish clear safety zones, verify crane or lifting equipment ratings, and confirm that wall plates and structural framing are level and plumb within acceptable tolerances. SIP panels are large and wind-sensitive; even a light breeze can make uncontrolled lifting dangerous. A site-specific lifting plan should be documented and communicated to every crew member, including signal protocols and exclusion zones.
Weather monitoring is non-negotiable. Installation should not proceed if rain is forecast within a 24-hour window or if sustained winds exceed the panel manufacturer’s lifting recommendations. Exposing SIP panels to ambient humidity and precipitation during site storage can raise core moisture content to 12% or higher within 48 hours, which degrades thermal performance and adhesive bonding. Always check localized forecasts and maintain a weather contingency plan on every job site.
Panel Storage on Elevated Cribs
SIP panels must never be stored directly on the ground. Ground contact wicks moisture into the panel edges and facings, and uneven surfaces can cause permanent deformation of the foam core. The correct method is to store panels on elevated cribs made of pressure-treated lumber or steel supports, spaced no more than 24 inches apart along the panel length to prevent sagging.
Each stack should be flat, level, and aligned. Use wooden dunnage between individual panels in a stack to allow air circulation and prevent facings from adhering to one another under heat and pressure. Stacks must be secured against wind uplift with straps or sandbags, and the storage area should be on stable, well-drained ground away from active traffic zones and overhead hazards.
Moisture Prevention with Breathable Tarps
Covering stored SIP panels is essential, but the choice of covering material matters significantly. Standard polyethylene tarps trap condensation between the tarp and the panel surface, creating a microclimate that promotes moisture absorption in the foam core and potential facing delamination. Instead, use breathable, UV-resistant panel covers that allow air exchange while shedding rainwater.
The tarp should be secured loosely enough to permit airflow around the stack but tightly enough to resist wind displacement. Inspect covers daily for tears, gaps, or pooling water, and adjust as site conditions change. If a non-breathable tarp is the only option available, prop it up with additional lumber to create an air gap between the cover and the panels, and ventilate the stack whenever possible.
24 to 48 Hour Acclimation Before Handling
SIP panels shipped from the factory may be at a different temperature and moisture equilibrium than the job site environment. Allowing panels to acclimate for 24 to 48 hours on-site before installation brings the core and facings to ambient conditions, reducing the risk of dimensional shift, adhesive failure, or joint separation after the panels are secured. This step is especially critical in climates with large temperature swings between day and night or between seasons.
Acclimation does not require the panels to be uncovered. Keep the breathable covers in place during the acclimation period to protect against unexpected rain or high humidity. Once acclimated, panels should be installed within the same day if possible; leaving them exposed overnight without protection reintroduces the moisture risks that acclimation was meant to mitigate.
Contractor Selection and SIP-Specific Expertise
The scarcity of contractors skilled in SIP installation is a well-documented industry challenge. Many general roofing contractors lack experience with SIP handling protocols, joint sealing techniques, and the structural integration requirements that differ from conventional stick framing. Homeowners and project managers report the most severe outcomes when SIP work is assigned to crews whose primary experience is traditional framing or asphalt shingle roofing.
When vetting contractors for a SIP roof project, verify that they have completed at least three prior SIP installations and can provide references from those projects. Request documentation of their training in SIP-specific lifting, sealing, and fastening procedures. A contractor who can walk you through their site prep checklist, acclimation protocol, and weather contingency plan is demonstrating the kind of systematic approach that separates SIP specialists from generalists.
Do not hesitate to ask for a written site preparation plan as part of the bidding process. Contractors who rely on generic roofing experience rather than SIP-specific procedures will often provide vague or incomplete answers. A detailed plan that addresses crib spacing, tarp specifications, acclimation scheduling, and lifting sequences signals that the contractor understands the unique demands of SIP roof installation.
Pre-Installation Site Checklist
- Structural framing verification: Confirm wall plates are level, plumb, and within tolerance before panels arrive on-site.
- Elevated crib preparation: Build or inspect storage cribs with dunnage spacing no greater than 24 inches on center.
- Breathable cover inventory: Ensure UV-resistant breathable tarps are available and inspect them for damage before use.
- Weather contingency plan: Document 24-hour forecast monitoring protocol and establish a clear go/no-go threshold for lifting operations.
- Acclimation scheduling: Coordinate panel delivery timing to allow a minimum 24-hour acclimation period before installation begins.
- Contractor SIP verification: Request proof of prior SIP installations, references, and a written site prep plan before signing the contract.
- Lifting equipment inspection: Verify crane or hoist ratings, inspect slings and straps, and confirm signal protocols with the lifting crew.
The Tools and Gear You’ll Need
Installing a Preflex SIP roof system requires precision tooling; relying on generic hardware compromises structural integrity and leads to costly envelope failures.
Lifting and Handling Equipment
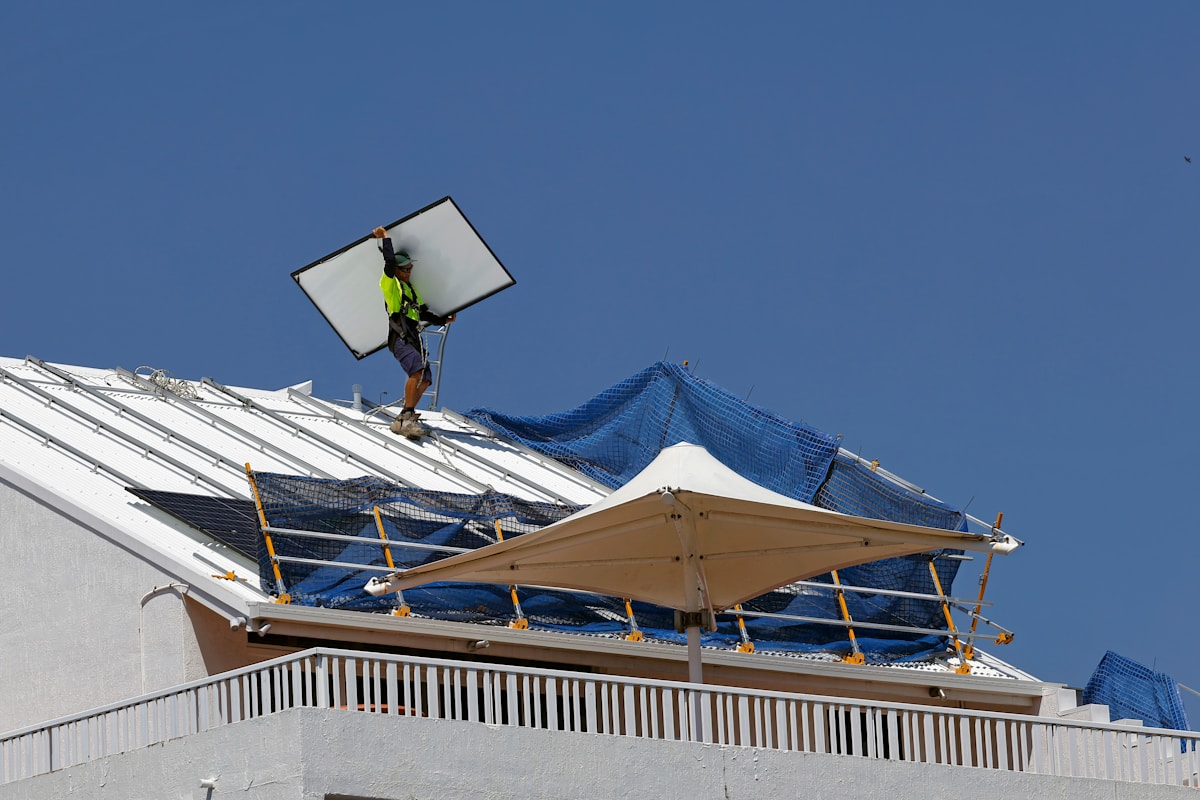
Structural Insulated Panel (SIP) roof components are large and cumbersome, making manual lifting unsafe and inefficient. To maintain production speed and ensure worker safety, you must invest in proper mechanical lifting gear. Given the panel dimensions often used in commercial roofing, specialized equipment prevents damage to the panel facings during transport.
- Panel Lifting Brackets: These are typically installed into the pre-cut spline grooves or the edge of the panel. For SIPs with GRP or CFRT facings, ensure the brackets do not exert point loads that could crack the skin.
- Vacuum Lifters or Spread Bar Slings: Essential for handling large-format panels. Vacuum lifters are preferred for smooth facings (like FRP or Aluminum), while spreader bars with soft slings are necessary for textured surfaces to prevent slippage.
- Gin Poles or Cranes: Required for positioning panels onto high roof lines. The choice depends on the building height and the weight of the specific foam core utilized (e.g., PET or XPS cores are significantly lighter than traditional timber, allowing for lighter lifting gear).
Structural Fastening Systems
Fastening SIPs requires more than just standard wood screws. The connection must resist wind uplift and shear loads while accommodating the unique expansion coefficients of composite materials. Using incorrect fasteners is a primary cause of panel rotation and roof failure.
- SIP Structural Screws: Use fully threaded, self-drilling screws specifically rated for SIPs (often #10 or #12 dimensions). These provide superior pull-out strength compared to common deck screws and are essential for connecting panels to top plates and splines.
- Neoprene-Washer Screws: For any through-face fastening—such as attaching roof sheathing or securing temporary bracing—use screws with integrated neoprene washers. These create a watertight seal around the screw head, preventing moisture intrusion which can delaminate the foam core.
- Pneumatic Nail Guns (Optional but Efficient): While screws are preferred for structural connections, framing nailers may be used for temporary bracing or non-structural holding, provided they do not damage the facing material.
Never substitute manufacturer-approved SIP adhesives with generic construction glues (like standard construction adhesive or silicone). SIPs experience thermal expansion; generic adhesives lack the elasticity to maintain a bond, leading to joint failure and air leakage.
Sealing, Adhesives, and Weatherproofing
The thermal performance of a SIP roof relies entirely on the integrity of the seal. Gaps in the sealing system can degrade the effective R-value and lead to condensation issues within the roof assembly. You must use specialized tapes and foams designed for the specific facing materials (GRP, CFRT, or Metal).
- SIP-Sealing Tape (Butyl or Acrylic): Use double-sided butyl tape specifically rated for SIPs. This tape acts as the primary air and vapor barrier between panel joints. Ensure the width matches the spline dimension (typically 3-inch or 4-inch widths are standard for residential and commercial applications).
- Low-Expansion Polyurethane Foam: Essential for sealing rough openings, wire chases, and perimeter gaps. Standard window foam expands too aggressively and can bow SIP panels; always select “low expansion” formulations to maintain panel alignment.
- Liquid Sealants: High-quality urethane or silicone sealants are required for flashing transitions and corners where tape cannot be applied effectively.
When applying butyl tape to foam cores like XPS or PET, ensure the substrate is clean and dry. In colder climates, keep the tape room temperature until application to ensure it adheres properly and flows into the panel texture.
Cutting and Fabrication Tools
On-site modifications are inevitable. Cutting SIPs requires precision to ensure square edges for tight joints. The type of facing dictates the cutting tool required to prevent chipping or delamination.
- Circular Saw with SIP Blade: Use a carbide-tipped combination blade or a specialized “SIP blade” designed to cut through both the skin and the foam core in a single pass without binding. For FRP/GRP facings, a finer tooth count is necessary to achieve a clean edge.
- Hot Wire Foam Cutter (Optional): Useful for creating smooth channels in the foam core for wiring or plumbing, though caution is needed to avoid melting adjacent facings.
- Router with Plunge Base: Ideal for recessing electrical boxes or creating precise spline connections. A straight bit allows for controlled depth adjustment critical for shallow cores.
Personal Protective Equipment (PPE)
Processing composite panels and foam materials generates specific dust and particulate hazards that require protection beyond standard construction gear.
- Respiratory Protection: Cutting foam cores (XPS, PU, PET) releases fine particulate matter. Use N95 masks or respirators with organic vapor cartridges when applying spray foam adhesives.
- Eye Protection: Safety glasses are mandatory, particularly when cutting FRP or fiberglass facings which can produce irritating splinters.
- Gloves: Heavy-duty work gloves protect against the sharp edges of cut metal or aluminum facings and the potential skin irritation from fiberglass reinforcements.
Getting the Ridge and Wall Plates Ready
Rigorous preparation of ridges and wall plates is the non-negotiable foundation of a high-performance SIP envelope. Misalignment at this stage creates gaps that standard tapes cannot bridge, directly leading to thermal bridging and long-term moisture risks.
Ridge Beam Leveling and Alignment
Unlike stick framing which can tolerate minor inconsistencies, Structural Insulated Panels (SIPs) are rigid. If the ridge beam is not perfectly straight and level, the roof panels will not seat flush against each other. A bowed ridge forces installers to either fight the panels into place—risking damage to the skins—or leave voids that compromise the structural spline connection. Before any lifting begins, verify the ridge beam’s crown and camber using a tight string line or laser level. Shimming must be done prior to panel arrival to ensure a continuous bearing surface.
Wall Plate Squaring and Anchoring Verification
The top plates of the exterior walls serve as the landing pad for the roof panels. Any deviation in squareness here will amplify at the ridge, potentially causing the roof to run out of dimension. It is critical to measure the diagonals of the wall structure to confirm they are equal. Additionally, verify that all anchor bolts and hurricane ties are properly set and do not protrude above the plate surface in a way that would interfere with the SIP skin. Uneven or obstructed wall plates create high and low spots, which prevents the sealing tape from adhering uniformly and compromises the weather barrier.
Beveled Plates and Minimum Bearing Requirements
To accommodate the roof pitch while maintaining full structural contact, beveled plates must be installed along the wall plates or ridge beam. It is a common misconception to use “birdsmouth” cuts on SIPs; this is incorrect as it notches into the foam core and weakens the structural integrity of the panel. Instead, install beveled lumber or plates on the structure itself. The industry standard for SIP bearing is a minimum of 1.5 inches. This ensures the load is transferred correctly through the skins and into the framing, not just crushing the foam core. The angle of the bevel must match the roof pitch precisely so that the outer skins of the SIP make full, flat contact with the supporting structure, maximizing the surface area for adhesives and mechanical fasteners.
Pre-cut your beveled plates using a table saw set to the exact roof pitch. Attempting to rip these on-site with a circular saw often leads to variance. A tight fit between the bevel and the panel is essential; gaps here act as thermal breaks and collection points for water intrusion.
Chalk Line Markings and Block-Out Preparation
Efficiency on lift day depends entirely on layout prep. Snap clear chalk lines on the ridge and wall plates indicating the center of the panel edges. More critically, identify and prepare block-outs for dormers, skylights, and vent stacks before the roof is installed. This is a vital step for moisture management. Cutting rigid foam insulation after the roof is enclosed generates significant fine dust. If this debris is left in the flutes or seams of the panels, it creates a “wick” that draws moisture under the roofing metal, leading to hidden leaks and mold growth. By framing and boxing out these penetrations at the deck stage, you ensure a clean seal and prevent the dust accumulation that so often causes premature SIP failure.
Lifting and Positioning SIP Roof Panels
Lifting SIP roof panels requires precise load-rated hardware and a minimum three-person team to manage wind loads and alignment. Immediate sealing of lifting points is critical to prevent moisture ingress and maintain long-term structural integrity.
Load-Rated Bracket Attachment and Hardware Safety
The integrity of the lifting operation begins with the hardware. Never use standard eyebolts or unverified rigging screws; you must utilize specifically engineered, load-rated lifting brackets or custom plates designed for Structural Insulated Panels. Generic hardware creates high point loads that can crush the foam core or delaminate the facings, creating hidden defects that compromise the roof’s structural safety decades later. Proper brackets distribute the lifting force across the structural skins rather than the insulating core. This is essential because while SIPs are incredibly strong in plane, the core material can be susceptible to localized compression if the lifting hardware is not sized correctly for the panel’s weight and dimensions.
Avoid lag screws into the edge of the panel unless explicitly specified by an engineer. These screws can strip out of the foam or the inner facing, causing the panel to drop. Always use clamps or through-bolted lifting plates with backing washers to ensure a positive connection.
Picking Eye Placement Based on Roof Pitch
Calculating the correct picking eye location is a physics problem dependent on the roof pitch and the panel’s center of gravity. For low-pitch roofs (under 4/12), lifting points are typically symmetrical. However, as the pitch increases, the center of gravity shifts, requiring the lifting eyes to be positioned further up the slope or the use of adjustable slings to keep the panel oriented correctly to the roof plane. If the lifting eyes are placed incorrectly, the panel will try to flatten out as it leaves the ground, placing immense stress on the rigging and potentially causing the panel to slip. Experienced riggers often use a spreader bar to maintain vertical lifting lines and prevent inward pressure on the panel edges, which is crucial for steeper pitches where gravity wants to slide the panel down before it is secured.
Vertical Lifting Protocol and Team Coordination
Vertical lifting of large-format SIP panels is not a solo job. The industry standard protocol mandates a minimum of three qualified installers: one crane operator and two ground guides handling taglines. SIPs are lightweight and present a large surface area, making them behave like sails in even mild wind conditions. The team members on the taglines are responsible for rotation and stabilization, ensuring the panel does not crash into the scaffold or the structure. This coordination is vital for preventing the “project delays and defects” nightmare often caused by inexperienced crews who try to rush the lift or muscle the panels into place without proper leverage.
- Pre-Lift Check: Verify all sling angles are less than 60 degrees to prevent horizontal forces that could buckle the panel.
- Communication: Establish clear hand signals or radio communication between the operator and the guides before the panel leaves the ground.
- Tagline Control: Maintain tension on taglines at all times to prevent the panel from spinning or swinging unpredictably.
Hole Sealing and Post-Placement Integrity
Once the panel is positioned and secured, the rigging is removed, but the work is not done. The lifting holes or bracket cutouts create immediate breaches in the building envelope. If these are left unsealed or merely taped over, they become primary entry points for moisture and air, leading to core rot and significant thermal loss. The best practice is to clean the hole of any debris, inject a sufficient amount of high-expansion spray foam to fill the void, and then seal the surface with specialized SIP tape or a compatible membrane. This step restores the thermal continuity and weather-tightness of the roof, ensuring that the high-performance insulation values of the panel are maintained for the life of the building.
Securing Panels to the Structural Frame
Fastener Selection and Engineering Schedules
The interface between SIP roof panels and the structural frame demands precision fastening governed by engineered schedules, not generic carpentry practices. Structural screws must match the panel thickness, core density, and anticipated load paths. Typical specifications call for corrosion-resistant structural screws ranging from 3 to 4 inches in length, spaced at 12 to 16 inches along bearing edges, with closer spacing near panel joints and penetrations.
Screw diameter and thread pitch should align with the engineering drawings for each project. Using undersized fasteners or deviating from specified spacing compromises the panel-to-frame connection and creates pathways for air and moisture infiltration. Every fastener placement should reference the structural schedule provided with the shop drawings.
Fastening Strategy: Exterior Side Before Lifting
Where the panel configuration and site access allow, securing the exterior-facing fasteners before the panel is lifted into position is a recognized best practice. This approach ensures that screw depth, alignment, and sealing washer placement can be verified from the ground level, reducing the risk of misdriven fasteners once the panel is overhead and difficult to correct.
Pre-fastening on the exterior also allows the installer to confirm that the structural screw penetrates the full bearing surface of the ridge or wall plate without bottoming out prematurely. If the plate thickness or panel combination requires verification, a test fastener should be driven into a scrap sample of the same assembly before committing to the full run.
Neoprene Washer Sealing at the Ridge
The ridge is the most vulnerable point for water intrusion on a SIP roof system. Every structural screw or fastener penetrating the ridge panel must be fitted with a neoprene washer sealing washer. The neoprene ring compresses against the panel facing and the fastener shank, creating a waterproof barrier that accommodates thermal expansion and contraction of the panel materials.
It is critical to torque the fastener to the manufacturer-specified value. Over-tightening crushes the neoprene washer beyond its recovery limit, while under-tightening leaves the seal uncompressed and ineffective. The result is a fastener channel that appears secure but permits water ingress during driving rain or ice dam conditions.
Minimum Bearing Verification on Ridge and Wall Plates
Structural integrity begins with adequate bearing. SIP roof panels must rest on ridge and wall plates with a minimum bearing length as defined by the engineering schedule, typically not less than 1 1/2 inches along the full panel edge. Insufficient bearing reduces load transfer capacity and increases the risk of panel deflection, seam separation, and fastener pull-through over time.
Before fastening, the installer should verify that the plate dimensions, lateral positioning, and surface flatness meet the specified tolerances. Any gap between the panel edge and the plate surface should be addressed with shimming or plate adjustment, never by forcing the fastener to compensate for poor contact.
Airtight Seam Sealing with Butyl Tape and Gaskets
Seam sealing between adjacent SIP roof panels relies on butyl tape and precision gaskets applied to the panel edges before mating. Butyl tape provides a permanent, non-curing seal that maintains elasticity across temperature swings and resists degradation from UV exposure at exposed edges. The tape must be applied in a continuous bead without gaps, overlaps, or contamination from dust and moisture on the panel surface.
Improper tape application is one of the leading causes of air leakage in SIP roof installations. Installers must peel the release paper immediately before placing the panel, press the joint firmly, and inspect the seam for complete tape compression. Any visible gap or unsealed edge represents a direct pathway for conditioned air loss and potential condensation migration into the core.
Adhesive Selection for SIP Roof Sealing
Generic construction adhesives are not suitable for SIP roof seam sealing and fastener head sealing. Only adhesives and sealants approved by the panel manufacturer should be used at joints, penetrations, and flashing interfaces. Manufacturer-approved products are formulated to maintain adhesion to the specific facing material, whether GRP, CFRT, or other composite skin, and to remain flexible under thermal cycling.
Substituting an unapproved adhesive, such as a polyurethane-based construction adhesive or a generic silicone, may appear to work at installation but often fails within months as the material loses adhesion, cracks, or shrinks. This creates hidden failure points that are costly to diagnose and repair after the roof assembly is complete.
Condensation and Moisture Management Beneath Panel Seams
SIP panels are not a substitute for a properly managed roof assembly. While the panel core and facings provide significant thermal and moisture resistance, condensation can still form on the underside of the panel interface if warm, moist indoor air reaches the cold surface through unsealed fastener holes or gaps at the seams. This is particularly relevant in cold climate zones where the temperature differential between conditioned space and the roof exterior is greatest.
A continuous vapor retarder or air barrier installed on the interior side of the SIP roof assembly is essential to prevent moisture-laden air from reaching the panel interior. Dust and construction debris left on the interior panel surface during assembly can also compromise the vapor barrier adhesion, creating localized condensation paths that remain hidden until damage is visible.
Waterproofing Layer Requirements Beyond the Panel
Assuming that SIP panels are fully waterproof is a misconception that leads to preventable failures. The panel itself provides structural and insulating performance, but the roof assembly requires an additional weather-resistant barrier, such as a self-adhering membrane or fluid-applied coating, installed over the panel seams and fastener lines. This layer acts as the primary water-shedding plane and protects the seams against driving rain, snow melt, and ice dam backup.
Flashing at all penetrations, valleys, and transitions must be integrated with the weather-resistant barrier and sealed with compatible tape or mastic. The combination of proper fastening, butyl tape seam sealing, neoprene washer sealing at the ridge, and a continuous external weather barrier creates a redundant defense system that addresses every known failure mode in SIP roof installation.
- Structural screw specification: Use corrosion-resistant structural screws per engineering schedule, typically 3 to 4 inches, spaced at 12 to 16 inches on bearing edges with reduced spacing at joints.
- Pre-fastening strategy: Secure exterior-side fasteners before lifting where feasible to verify depth, alignment, and washer compression from ground level.
- Ridge sealing: Every ridge fastener must use a neoprene washer sealing washer torqued to specification, never over- or under-compressed.
- Bearing verification: Confirm minimum bearing length on ridge and wall plates before fastening; shim or adjust plates to eliminate gaps.
- Butyl tape application: Apply continuous butyl tape to panel edges immediately before mating, ensuring zero gaps and full compression.
- Adhesive compatibility: Use only manufacturer-approved sealants and adhesives for SIP roof assemblies; generic products fail under thermal cycling.
- Weather barrier: Install a continuous external weather-resistant barrier over all seams and fastener lines; panels alone do not constitute a waterproof roof assembly.
- Condensation control: Maintain a continuous interior vapor retarder and air barrier to prevent moisture migration into the panel interface.
Conclusion
SIP roof installation rewards teams that plan before they lift. You reviewed snow load and wind uplift parameters, confirmed local fire code compliance, and checked shop drawings against production tolerances. Those early engineering steps prevent field problems that cost time and money. Our manufacturing facility produces panels with integrated connection systems that simplify field assembly — but only when the ridge and wall plates are square and level before lifting begins. We’ve seen projects stall because joint sealing tape wasn’t applied correctly or panel thickness didn’t match the specified R-value for the climate zone. Verify your panel specs against your structural drawings. Confirm your crew has the right lifting gear and sealing materials before the truck arrives on site.
- Review your engineering calculations for snow load and wind uplift with our technical team before placing your order
- Request shop drawings and cross-reference panel thickness against your climate zone’s R-value requirements
- Confirm your installation crew understands joint sealing tape and adhesive specifications before lifting begins
- Reach out to our engineering support with any design questions — no purchase required
Frequently Asked Questions
Should the attic below a SIP roof be ventilated?
SIP roof assemblies are inherently airtight, which changes traditional ventilation requirements. Most building codes now permit unventilated attic spaces above SIP roofs when a proper vapor barrier is installed on the warm side. However, in hot-humid climates, a vented attic cavity may still be recommended to manage heat buildup. Consult local code and a structural engineer before deciding on ventilation strategy.
How do you manage condensation under SIP roof panels?
Condensation risk arises when warm, moist indoor air contacts cold panel surfaces. The key is installing a continuous interior vapor barrier on the warm side of the assembly before any interior finish. Additionally, ensure the exterior metal roofing has adequate airflow clearance and use closed-cell foam cores like XPS or PET, which resist moisture absorption. Proper HVAC dehumidification during occupancy further reduces condensation risk.
What interior vapor barrier is recommended for SIP roof assemblies?
Class I vapor barriers such as 6-mil polyethylene sheeting or foil-faced rigid foam are commonly specified for SIP roof assemblies in cold and mixed climates. In hot-humid regions, a Class II vapor retarder like latex paint may suffice depending on the climate zone. Always verify the selected barrier is compatible with the panel facing material and meets local code requirements for your specific climate zone.
Can solar panels be mounted on a SIP roof system?
Yes, solar arrays can be installed on SIP roofs, but the mounting strategy must be carefully planned to preserve panel integrity and waterproofing. Ballasted mounting systems that avoid penetrations are preferred, or penetrations must be flashed and sealed at every fastener point using manufacturer-approved methods. Structural engineering review is essential to confirm the SIP panel can support the additional dead and live loads from the solar array.
How are electrical and plumbing chases routed through SIP roof panels?
Chases are typically created during the manufacturing process by leaving designated voids within the foam core, or by cutting channels after fabrication. Pre-planned chase locations should be coordinated with the panel supplier before production begins. Avoid field-cutting chases near panel edges or spline joints, as this compromises structural continuity. Seal all chase openings with compatible tape or fluid-applied membrane to maintain the airtight envelope.
What roofing materials are compatible with SIP roof panel systems?
SIP roof panels accept a wide range of exterior roofing materials, including standing seam metal, modified bitumen, TPO, EPDM, and asphalt shingles. The critical factor is ensuring the roofing underlayment and fastening method do not compromise the panel facing. Metal roofing is particularly common due to its light weight and compatibility with the airtight SIP assembly. Always follow the roofing material manufacturer and SIP panel supplier installation guidelines.
How should butyl tape be correctly applied to SIP roof joints?
Butyl tape must be applied to clean, dry panel surfaces before mating joints. Use a minimum 4-inch wide butyl-based SIP tape specifically designed for insulated panel systems. Press the tape firmly along the full length of the joint with consistent contact—air pockets or wrinkles create leakage paths. Do not stretch the tape during application, and avoid repositioning once bonded. Manufacturer-approved adhesives should supplement tape at critical intersections for a continuous air and water barrier.