
Installing metal siding on a mobile home looks like a standard cladding job, but thermal expansion will tear a poorly planned project apart within two seasons. We see failures often because fasteners are overtightened, failing to account for the natural expansion and contraction caused by temperature fluctuations. At RaxPanel, we treat mobile home retrofits with the same strict engineering standards as our commercial builds because the material physics remain identical regardless of the structure size. Metal siding offers a durable, fire-resistant finish, but it requires specific installation techniques to maintain that integrity.
This guide covers the critical selection of compatible fasteners and the correct method for preparing your wall substrate to prevent moisture intrusion. We also walk through the precise measuring techniques required to minimize waste and ensure your panels fit the first time. Follow this process, and you secure an exterior that passes inspection and delivers long-term energy efficiency without the risk of premature failure.
Gather the Right Tools and Materials
High-quality metal siding demands precision tools. Using the wrong fasteners or cutting methods can compromise weather-tightness and void warranties. Investing in the right equipment upfront prevents costly callbacks and structural failures.
Essential Metal Siding Fasteners and Sealants
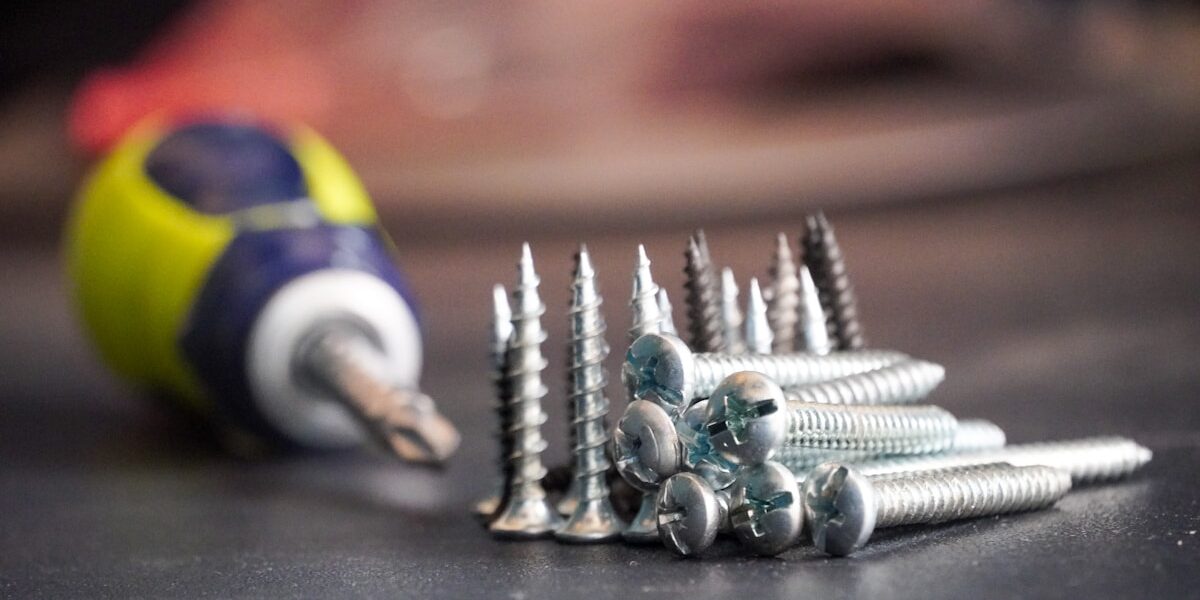
The number one failure point in mobile home siding installations is the fastener. Standard wood screws or drywall screws are unacceptable for metal applications. You must use fasteners specifically engineered for metal siding to withstand thermal expansion and prevent corrosion. As a manufacturer with over 15 years of field experience, we consistently see that premature rusting and panel oil-canning (waviness) stem directly from contractors skimping on fastener quality.
Never overtighten screws. Metal panels expand and contract with temperature changes. Driving a screw too tight restricts this movement, causing “oil-canning” and eventually tearing the metal, which leads to leaks. Fasteners should be snug against the washer, not crushing the panel.
- Self-Drilling or Self-Tapping Screws: Use self-drilling screws for wood or steel framing without pre-drilling. Ensure the drill point matches the thickness of your underlying structure (e.g., #12 point for heavy gauge steel, #3 for wood).
- EPDM Washer Heads: Always use screws with EPDM (Ethylene Propylene Diene Monomer) bonded washers. These rubber seals compress against the metal panel to create a watertight barrier. Avoid neoprene washers, which dry rot and crack faster.
- Color-Matched Painted Heads: Purchase screws with heads painted to match your siding color (e.g., Polar White, Bronze, Slate). This prevents the “speckled” look and hides the fasteners visually.
- Butyl or Exterior Sealant: For corner posts, J-channels, and flashing, use a high-quality butyl tape or polyurethane sealant. Silicone is generally not recommended for mobile home metal siding as it can be messy and lose adhesion to painted metal surfaces over time.
Cutting Tools for Metal Panel Installation
Cutting metal generates heat and burrs that can damage the protective coating of your panels. While an angle grinder with an abrasive cut-off blade is common, it is often the “worst practice” for finished siding. The friction from abrasive blades heats the metal enough to burn off the paint and galvanization at the cut edge, leading to rust starting exactly where you cut. We recommend using non-thermal cutting methods to preserve the integrity of the panel’s finish.
If you must use an abrasive saw, reverse the blade so the rotation cuts “down” through the metal. This blows the hot sparks away from the face of the panel, preventing burn marks on the visible surface.
- Electric or Pneumatic Nibblers: These are the gold standard for cutting metal siding. They “chew” away the metal without creating sparks or heat, leaving a clean, burr-free edge that won’t rust.
- Double-Cut Shears: These tools act like a large pair of scissors for sheet metal. They are fast, cool, and leave a very clean edge suitable for long straight cuts.
- Tin Snips (Aviation Snips): Essential for trimming small notches, cuts around outlets, or intricate shapes. Keep a set of red (left cut), green (right cut), and yellow (straight cut) snips handy.
- Circular Saw with Metal Blade: Only use saw blades specifically designed for metal (ferrous or non-ferrous) with 60-80 teeth. These cut cool and fast compared to abrasive discs.
Measuring and Layout Equipment Checklist
Unlike vinyl siding, metal panels cannot be easily stretched or “coaxed” into place if your measurements are off. They are rigid. Accuracy in your layout determines whether your reveal lines are straight and your corners are plumb. A 1/4-inch error at the foundation can amplify to a 2-inch disaster by the roofline.
- 25-Foot or 30-Foot Tape Measure: A heavy-duty, lockable tape measure is your primary tool. Ensure the blade is wide enough (at least 1-inch) to stay rigid when extended for long vertical measurements.
- 2-Foot and 4-Foot Levels: You need both for different tasks. The 4-foot level is critical for checking the straightness of starter strips and corner posts. The 2-foot level is perfect for checking shorter runs around windows and doors.
- Chalk Line Reel: Use a high-visibility chalk (blue or orange) to mark straight lines for your starter strips and furring channels. Red chalk is permanent and should be avoided on visible surfaces.
- Speed Square: Also known as a rafter square, this is indispensable for marking square cross-cuts on panels and ensuring your angles are perfectly 90 degrees.
- Story Poles: A simple stick marked with the exact reveal measurements of your siding panels can speed up layout significantly and prevent cumulative measuring errors.
Safety Gear for Metal Siding Work
Metal siding edges are often razor-sharp right out of the package. Processing metal creates microscopic shards that are dangerous to skin and eyes. Before you even unpack the first panel, you must have your personal protective equipment (PPE) on. In our manufacturing facilities, strict adherence to safety gear is non-negotiable; treat your mobile home project site with the same professional caution.
- Cut-Resistant Gloves: Standard work gloves are often not enough. Leather gloves with Kevlar lining or specifically rated “cut-resistant Level 3+” gloves are essential for handling sheet metal edges.
- Safety Glasses: Metal shavings from drilling or cutting are sharp and fly fast. Wraparound safety glasses protect your eyes from both direct impact and falling debris.
- Hearing Protection: Cutting metal with shears or saws is loud. Use quality earplugs or over-the-ear muffs to prevent long-term hearing damage.
- Non-Slip Boots: You will likely be on ladders or scaffolding. Boots with aggressive tread and a defined heel can prevent slips, especially when dealing with the added weight and bulk of metal sheets.
How to Protect Yourself From Injury
Metal siding installations present severe laceration risks from cut edges and significant fall hazards. Strict adherence to Personal Protective Equipment (PPE) and tie-off protocols is non-negotiable for site safety.
Protecting Hands From Sharp Metal Edges
Metal siding panels, particularly fresh cuts, possess edges that are sharper than standard utility knives. The primary danger comes from “metal swarf”—the tiny spirals of metal shavings created by cutting tools—and microscopic “burrs” left on sheared edges. These can slice through standard cotton work gloves instantly, leading to severe lacerations and potential infection. Installers must treat every panel edge as a live blade until it is permanently fastened and capped with trim.
- Cut-Resistant Gloves: Use gloves rated specifically for cut resistance (ANSI/ISEA Level A3 or higher is recommended for metal work). High-performance cut-resistant gloves offer superior dexterity compared to traditional leather, allowing installers to manipulate fasteners without removing protection.
- Handling Technique: Never slide a hand along the flat face of a panel towards the edge to align it. Always grip panels from the sides or use suction handles for larger sheets to keep digits clear of the shear zone.
- Immediate Disposal: Metal offcuts and debris are often invisible on the ground. Sweep the work area frequently to prevent stepping on or kneeling on sharp scraps, which can easily puncture standard work boots.
Never wear gloves with loose cuffs near rotating cutting tools like saws or nibblers. The fabric can catch in the mechanism, pulling a hand into the blade before the operator can react.
Fall Prevention When Working at Height
Installing metal siding inherently requires working on ladders, scaffolding, or lift platforms. The combination of lifting heavy, awkward sheets and balancing on elevation significantly increases fall risk. Unlike other materials, metal panels can act as sails if a gust of wind catches them, knocking an installer off a ladder instantly. Fall protection is not merely a precaution; it is a lifesaving system that must be rigged before the first panel is raised.
- Ladder Safety Protocols: Always adhere to the 4:1 rule for extension ladders (one foot out from the wall for every four feet of height). The ladder must extend at least three feet above the eave to provide a secure handhold when transitioning onto the roof or high wall.
- Personal Fall Arrest Systems (PFAS): For work exceeding six feet in height, OSHA regulations mandate a body harness and lanyard tied off to a certified anchor point. Never rely on the structural integrity of the siding itself as an anchor point.
- Hoisting Mechanisms: Do not attempt to carry full-length metal panels up a ladder. Use a rope and pulley system or a material lift to raise sheets to the installation height. This keeps both hands free for climbing and stabilizing on the ladder.
Eye and Respiratory Protection Essentials
The physical act of cutting and drilling metal creates two distinct hazards: high-velocity projectiles and fine particulate matter. Metal shavings act like shrapnel, capable of penetrating the eye at high speeds. Additionally, cutting through metal coatings, galvanized layers, or existing paint can release toxic fumes and microscopic dust that cause immediate irritation and long-term respiratory damage. Standard eyewear is often insufficient for the velocity of debris generated by power shears or saws.
- High-Impact Eye Protection: Utilize safety glasses or goggles that meet ANSI Z87.1 standards for high-velocity impact. For overhead cutting work, full-face shields are recommended to prevent debris from falling into the eyes from above.
- Respiratory Defense: When cutting metal, particularly galvanized steel, operators are exposed to zinc oxide fumes which can cause “metal fume fever.” Use a NIOSH-approved respirator with at least an N95 rating for general dust; a half-mask respirator with organic vapor/acid gas cartridges is required when cutting through painted or coated materials.
- Airflow Management: When cutting indoors or in confined spaces, ensure adequate ventilation to disperse fumes. Position fans to blow dust away from the operator’s breathing zone, rather than recirculating it.
Compare Costs: DIY vs. Hiring a Pro
Professional installation typically accounts for 30% to 60% of total project costs, but hidden expenses and material waste in DIY projects often narrow the savings significantly.
Material Cost Breakdown for Metal Siding
Metal siding panels for mobile homes and prefab structures generally range from $2 to $14 per square foot, depending on material grade, gauge thickness, and finish type. Basic galvanized steel panels sit at the lower end, while aluminum or coated steel variants with enhanced weather resistance command premium pricing. Insulated metal panels, which integrate foam backing directly into the panel, carry a higher upfront cost but eliminate the need for separate insulation installation—a meaningful trade-off for remote or modular construction projects.
Additional materials include starter strips, corner posts, trim pieces, fasteners with EPDM washers, and weather-resistant barriers. These ancillary components typically add 15% to 25% to the base panel cost. Homeowners should account for 10% to 15% material waste during cutting and fitting, especially on structures with complex angles or multiple penetrations for windows and doors.
Tool Investment Versus Rental Expenses
A complete DIY metal siding toolkit requires snips or electric metal shears, a circular saw with a non-ferrous metal blade, a drill with clutch settings, a tape measure, chalk line, level, and safety equipment. Purchasing these tools outright ranges from $400 to $1,200 for quality equipment. Rental options reduce this to approximately $50 to $150 for a weekend project, though repeated use on larger jobs can erode the savings.
For mobile home wall replacement or modular building cladding, specialized lifting equipment may be necessary for panel handling. Scissor lifts or scaffolding rentals add another $100 to $300 per day, a cost that professional contractors absorb through bulk equipment ownership and project scheduling efficiency.
Professional Installation Labor Cost Estimates
Labor costs for professional metal siding installation vary by region and project complexity. Standard residential installations range from $3 to $12 per square foot for labor alone. Difficult-access sites, multi-story structures, or remote locations can push labor costs toward the upper end of that range or higher. Contractors with experience in mobile home and prefab construction may charge a premium for their specialized knowledge of lightweight panel systems and structural attachment requirements.
The labor percentage of total project cost typically falls between 30% and 60%, with material quality and project scale being the primary variables. Larger projects benefit from economies of scale, reducing the per-square-foot labor rate.
Hidden Costs DIY Homeowners Often Overlook
Several cost categories frequently escape DIY budget calculations. Time investment is the most significant—projects that take professionals two to five days often extend to one to three weeks for inexperienced installers, translating to lost productivity or temporary housing needs. Mistakes during cutting or fastening generate material waste that compounds quickly, especially with pre-finished panels that cannot be re-coated.
- Repair and replacement costs: Damaged panels due to improper handling or installation errors require full replacements at current market prices.
- Permit and inspection fees: Many municipalities require permits for exterior cladding changes, with fees ranging from $100 to $500 depending on locality.
- Warranty voidance risk: Manufacturer warranties often require professional installation; DIY work may leave homeowners without coverage for material defects or performance guarantees.
- Insurance implications: Unpermitted or improperly installed siding may create coverage gaps in homeowners insurance claims related to weather damage.
- Corrective work: Fixing installation errors such as improper fastener placement, inadequate sealing, or misaligned panels often costs more than the original mistake would have prevented.
| Feature | DIY Reality | Professional Standard | Critical Outcome |
|---|---|---|---|
| Labor Allocation | High time investment, unskilled execution, and manual tear-down | Skilled execution utilizing specialized equipment and professional safety protocols | Project Timeline Efficiency |
| Thermal Expansion | Risk of overtightening; restricted panel movement leading to warping | Snug-but-not-tight application; allows for necessary expansion and contraction | Prevents Warping & Fastener Failure |
| Fastener Selection | Potential use of generic screws lacking weather protection | Mandatory utilization of EPDM washer or Stainless Steel fasteners | Weatherproof Seal & Corrosion Prevention |
| Access & Handling | Limited capability for difficult access or remote installation areas | Optimized logistics and specialized equipment for complex site access | Safety Compliance & Structural Prep |
| Lifecycle Durability | Variable lifespan heavily dependent on individual installation quality | Strict adherence to warranty specifications; optimized for extended service life | Asset Protection & Long-term Value |
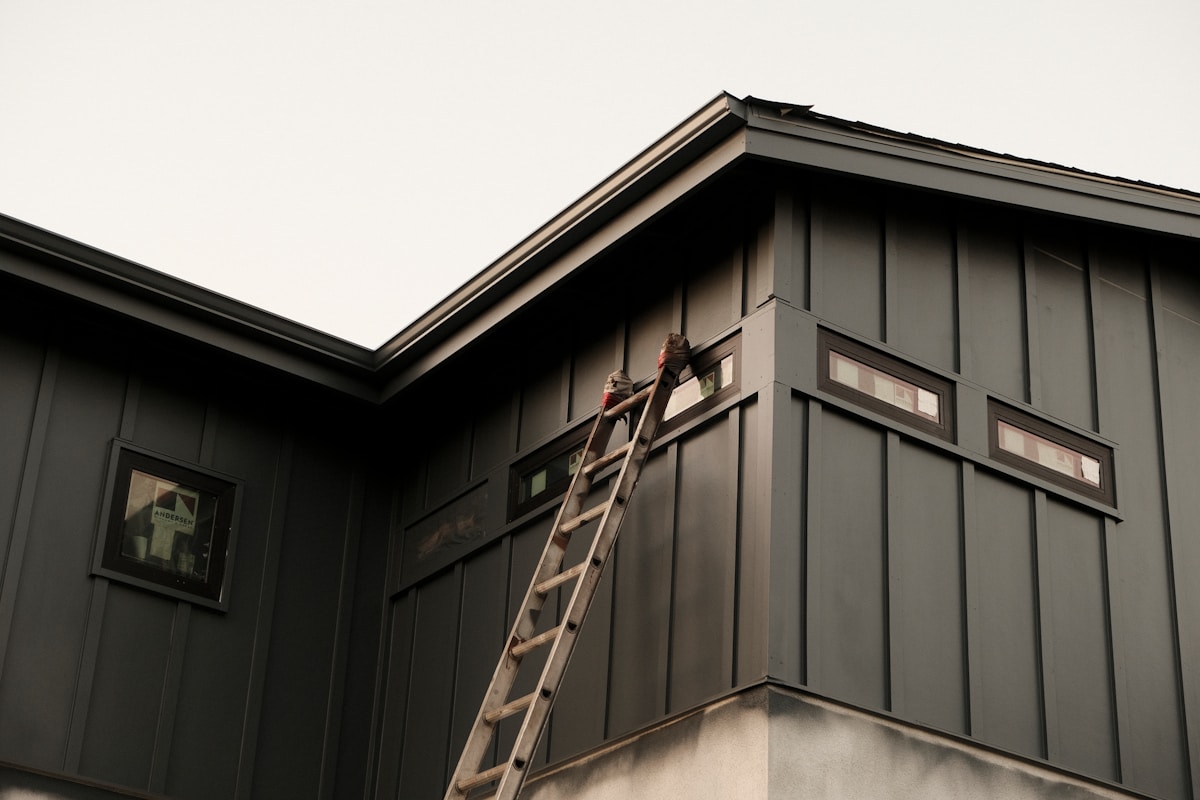
Inspect Your Home and Check Permits
Installing metal siding over a compromised structure is a guaranteed financial loss. Before purchasing materials, a structural audit of the sheathing and verification of local mobile home codes are mandatory prerequisites.
Conducting a Structural Audit
Never assume a visually acceptable exterior is sound. In the mobile home market, particularly with “flipped” properties, fresh paint is frequently used to mask underlying decay. DIY installers must look beyond the surface layer to identify vulnerabilities that will compromise new cladding. A high-performance composite or metal siding system cannot function correctly if the substrate is soft, rotting, or moisture-damaged.
Begin by thoroughly inspecting the home’s exterior sheathing for signs of water intrusion, soft spots, or delamination. If existing siding is already present, removing sections to inspect the structural integrity is often necessary. Any compromised areas must be repaired or replaced before proceeding. Ignoring this step leads to trapped moisture, which rapidly degrades both the new siding and the structural wall from the inside out.
Verifying Permits and Code Compliance
Mobile home renovations are subject to stricter regulatory scrutiny than standard site-built homes in many jurisdictions. Installing metal siding is not merely a cosmetic upgrade; it is a structural modification that often requires a building permit. Compliance ensures the home meets local wind load requirements and fire safety standards, which is critical for insurability and resale value.
Homeowners must verify specific fastening standards with their local building authority. Regulations often dictate the type and spacing of fasteners required to secure heavy or wind-resistant panels to a mobile home frame. Failure to obtain the correct permits can result in stop-work orders, fines, or the requirement to remove completed work.
Skipping permits creates a “cloud on the title.” When selling the home, unpermitted work discovered during inspection can derail closing or significantly lower the property value. Always verify regulations before purchasing materials.
Addressing Multi-Section Joints
For double-wide or multi-section mobile homes, inspection must focus on the marriage lines or expansion joints. These areas are prone to separation and air leakage over time. When installing rigid siding, these gaps must be properly shimmed and sealed to prevent thermal bridging and air infiltration. If the sections have settled unevenly, the siding installation must account for this variance to avoid buckling or creating gaps that allow water entry.
Prepare Your Walls for New Siding
Rigid metal and composite panels will reveal every imperfection in your wall structure. Unlike flexible vinyl, these materials require a substrate variation of no more than 1/4 inch over 10 feet to ensure a professional finish.
The Rigidity Reality: Why Metal and Composite Panels Are Unforgiving
One of the most costly mistakes beginners make is underestimating the structural stiffness of modern siding materials. Whether you are installing insulated metal panels (IMPs) for modular homes or lightweight fiberglass composite panels, the material does not bend. If your substrate has a bump, dip, or wave, the panel will bridge it, creating an unsightly shadow line or, worse, stressing the fasteners and causing “oil canning” in metal surfaces. For applications like mobile home skirting or RV exterior cladding, where the material is thin yet strong, the substrate must be perfectly uniform to prevent vibration and fatigue cracks over time.
Systematic Removal of Old Cladding
You cannot effectively install high-performance composite or metal siding over existing wood or vinyl. The old layers must be stripped down to the structural sheathing or studs to ensure a valid attachment point. Leaving old siding in place adds unnecessary weight—a critical factor for mobile homes and lightweight prefab structures—and compromises the thermal envelope.
When removing old siding, pay close attention to the fasteners you remove. If you pull out 3-inch screws from a 1-inch thick substrate, it indicates previous structural issues or “over-fastening” that has damaged the studs. These weakened points must be reinforced before new panels are hung.
Substrate Inspection and Repair Protocols
Once the wall is exposed, the focus shifts to the sheathing (OSB, Plywood, or SIPs). This layer acts as the primary nailing base. For lightweight composite panels often used in truck bodies or marine applications, the pull-out strength of every screw is paramount.
- Check for Rot and Moisture: Probe the sheathing with a screwdriver in areas around windows and doors. Soft spots indicate water damage that must be cut out and replaced with fresh material matching the original thickness.
- Fastener Extraction: Old nails and screws left in the studs will prevent new siding from sitting flush. Use a cats paw or magnetic sweep to ensure the framing surface is clean.
- Flatness Verification: Use a long straightedge or level. If the wall bows out more than 1/4 inch over an 8-foot span, you must either plane down high spots (on wood) or shim the framing members to create a flat plane.
Do not rely on the siding to flatten a crooked wall. Relying on the rigidity of a metal panel to straighten a bowing wall will result in immense stress on the connection points. Eventually, the fasteners will shear, or the panel face will warp permanently.
Addressing the “Thermal Gap”
In prefab and modular home applications, walls often settle, leaving gaps between the sheathing and the framing. Before hanging new fire-resistant metal siding or insulated panels, these voids must be addressed. While the next section covers insulation, identifying structural gaps now prevents the new material from flexing when walked on or leaned against, a common requirement for high-traffic areas like RV exteriors or mobile home porches.
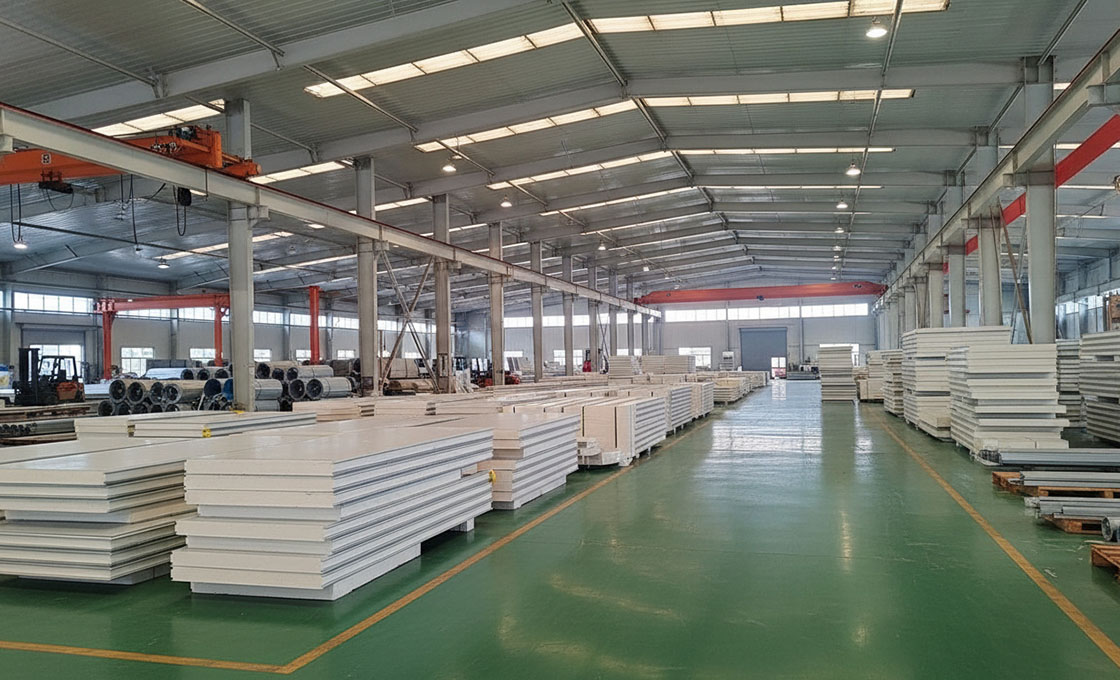
Install Weather Barriers and Insulate
The primary cause of siding failure is not the exterior material, but moisture trapped behind it. A correctly installed weather barrier and insulation system acts as an insurance policy, managing thermal bridging and diverting liquid water before it reaches the structural sheathing.
The Critical Role of Weather-Resistant Barriers
A Weather-Resistant Barrier (WRB) is the essential defense line against water infiltration. While metal siding is durable, wind-driven rain can easily penetrate through lap joints and seams. The WRB’s job is to shed this bulk water while allowing the wall assembly to breathe, preventing the buildup of moisture vapor that leads to rot and mold. In the industry, the shift from traditional asphalt-saturated felt to synthetic house wraps is driven by the latter’s superior tear resistance and consistency. However, material choice is secondary to installation logic.
The WRB must always be installed following a “shingle” effect. Upper layers must overlap lower layers, ensuring that water is directed downward and away from the structure, rather than being channeled into seams. Horizontal laps should be generous to account for building movement, while vertical laps must be staggered to prevent continuous channels for water migration. Seams and penetrations represent the highest risk points; failing to tape these transitions with manufacturer-approved tapes compromises the entire drainage plane.
Addressing Thermal Bridging with Insulation
Effective insulation goes beyond simply stuffing material between studs. In a framed structure, the studs themselves act as thermal bridges—highways for heat to escape or enter, bypassing the cavity insulation. To maximize energy efficiency, particularly in mobile or prefab structures with thinner walls, industry experts recommend a hybrid approach: combining cavity insulation with a continuous layer of rigid foam board over the sheathing.
Cavity insulation, such as fiberglass batts, is cost-effective but loses performance significantly if compressed. It must be cut to fit snugly without forcing it into the bay, which reduces its loft and thermal resistance. In contrast, rigid foam boards (XPS or EPS) applied to the exterior sheathing break the thermal bridge at the framing members. This continuous layer raises the overall R-value of the assembly and provides a flat, stable substrate for the metal siding. When installing rigid foam, joints must be sealed with tape to maintain the air barrier integrity.
Vapor Management and Flashing Integration
Controlling vapor diffusion is a balancing act that depends heavily on the climate zone. The “warm-side” rule is the standard guideline: the vapor retarder should be installed on the side of the insulation that is typically warm. Installing a vapor barrier on the cold side can trap moisture inside the wall cavity, leading to condensation and structural degradation during colder months. For many applications, a smart vapor retarder that adapts its permeability based on humidity levels offers a safer, more forgiving solution than a continuous polyethylene sheet.
Flashing is the intersection where the WRB meets the real world, specifically around windows, doors, and corners. These areas are geometrically complex and prone to leaks. Flashing must be integrated in a way that directs water down and out, never allowing it to pool behind the trim. This requires a specific sequence: sill flashing first, followed by side flashings, and finally the head flashing, all integrated seamlessly with the weather barrier. Skipping this step or relying solely on caulk is a critical error that invariably leads to water damage and call-backs.
| Material/Component Type | Specification | Installation Requirement | Fastening Method | Key Benefit |
|---|---|---|---|---|
| Asphalt-Saturated Felt (No. 15/30) | 15 lb or 30 lb per square, ASTM D226 compliant | Overlap horizontal seams 2 inches, vertical seams 6 inches | Cap nails or staples with 1-inch minimum embedment | Provides secondary water-resistive barrier beneath metal siding |
| Synthetic House Wrap (Polypropylene) | Minimum 45 min ASTM E2178 water resistance, breathable | Overlap seams 6 inches, tape all seams and penetrations | Cap nails or staples, ensure flat contact without wrinkles | Air and water barrier while allowing moisture vapor transmission |
| Fiberglass Batts | R-13 to R-19, 3.5 to 6 inches thick depending on cavity | Fit snugly between studs without compression, vapor barrier on warm side | Friction fit within stud cavities, secure with facing tabs | Cost-effective thermal resistance with established installation standards |
| Rigid Foam Board (XPS/EPS) | R-4 to R-5 per inch, 1 to 2 inches exterior | Install continuous layer over sheathing, seal all joints with tape | Mechanically fastened with wide-head caps or adhesive | Eliminates thermal bridging through framing members |
| Spray Foam (Closed-Cell) | R-6 to R-7 per inch, minimum 2-inch applied thickness | Apply directly to interior sheathing, fill all cavities completely | Adheres directly to substrate, no additional fasteners required | Acts as both air barrier and thermal insulation in one layer |
| Vapor Retarder (Class I or II) | Polyethylene (6 mil) or kraft-faced batts, per climate zone | Install on interior warm side, seal all seams with tape | Stapled to framing members with overlapping seams | Prevents interior moisture from reaching cold siding surface |
| Window & Door Flashing Integration | Flexible flashing tape or drip edge, compatible with weather barrier | Flash windows and doors before siding, direct water outward | Adhesive-backed flashing or mechanically fastened drip edges | Directs water away from vulnerable openings and prevents infiltration |
Attach Level Starter Strips
The starter strip is the absolute foundation of the installation. If this base is not perfectly level and secured, every subsequent row of siding will compound the error, resulting in wavy panels and compromised water drainage.
The Critical Role of Starter Strips
The starter strip serves two distinct but equally vital functions: alignment and drainage. It acts as the physical shelf that supports the first row of metal siding panels, locking them into place at the correct angle. Furthermore, it directs water away from the structure’s foundation. Because metal panels are rigid and do not bend like vinyl, the starter strip must be installed with extreme precision. Any deviation here— even a fraction of an inch over a long wall— will create a visible “stairstep” effect that is impossible to hide once the installation progresses upward.
Why Metal Demands Higher Precision Than Wood
A common mistake for novices is treating metal siding with the same tolerance as wood or vinyl. Wood can often be scribed or trimmed on-site to hide irregularities, but metal panels are manufactured to exacting dimensions. Thermal expansion is a critical factor here; metal expands and contracts significantly with temperature changes. If the starter strip is nailed too tightly or without proper expansion slots, the movement of the panels can cause oil-canning (waviness in the metal) or fastener failure. You must plan for this movement during the attachment phase to ensure the facade remains flat and structurally sound.
Installation Protocol for a Level Base
To achieve a professional finish, you must establish a level reference point that accounts for the variations in the foundation. This process requires patience rather than speed.
📋 Actionable Steps
- Step 1: Establish the Low Point
Identify the lowest point of the wall where the siding will terminate. Measure up from this point the distance specified by the manufacturer (typically 1 to 2 inches above the foundation or flashing edge) to ensure water runoff clears the surface. - Step 2: Snap a Chalk Line
Using a high-quality level or laser level, transfer this height mark around the entire perimeter of the building. Snap a continuous chalk line to serve as your visual guide. Do not rely on the foundation or existing trim as a reference, as they are rarely perfectly level. - Step 3: Position and Fasten
Align the top edge of the starter strip with the chalk line. Install corrosion-resistant fasteners (such as stainless steel or hot-dipped galvanized nails) into the center of the pre-punched nailing fins. Space fasteners according to engineering specs, usually every 8 to 12 inches (20 to 30cm) on center. - Step 4: Verify Horizontal Alignment
Before proceeding, place a level on top of the installed strip at multiple locations. If the strip drifts out of level, it must be adjusted immediately. Remember, you cannot “shim” metal siding later like you can with hardwood flooring.
Hang the Metal Panels Correctly
Metal panels are dynamic materials that expand and contract with temperature fluctuations. Installation must prioritize thermal movement over rigid rigidity to prevent catastrophic failure.
Accommodating Thermal Expansion and Preventing Overtightening
The most frequent failure point in metal siding installation is the restriction of natural thermal movement. Metal siding acts as a large exothermic sheet; significant temperature changes cause the material to expand and contract. If fasteners are driven too tightly, effectively “pinning” the panel against the substrate, this natural movement is restricted. The result is often dramatic “oil canning” (visible waviness), stress fractures at the fastener points, or tearing of the panel face.
Installers must adhere to the “snug-but-not-tight” rule. The fastener should engage the structure and seal the gasket, but the metal panel must remain free to “float” slightly beneath the washer head. In ribbed profiles, this is often achieved by pre-drilling oversized holes in the ribs—typically 1/16″ to 1/8″ larger than the fastener diameter—to allow for lateral sliding without compromising the seal.
Selecting the Correct Fasteners for Corrosion Resistance
The longevity of a metal siding project is often dictated by the corrosion resistance of the fasteners, not the panels themselves. Using generic, uncoated steel screws invites rapid rust formation, which leads to unsightly “tea staining” streaks down the facade and eventual structural failure of the connection. Furthermore, dissimilar metals can trigger galvanic corrosion when they come into direct contact.
- EPDM Washer Integration: Fasteners must feature a neoprene or EPDM (Ethylene Propylene Diene Monomer) washer. This rubber gasket compresses against the metal panel rib to create a watertight seal that prevents water intrusion at the penetration point.
- Coating Compatibility: For aluminum or steel siding, use fasteners with a protective coating such as zinc plating, ceramic coating, or stainless steel (specifically 304 or 316 grade for coastal environments) to ensure the lifespan of the fastener matches that of the cladding.
Securing Panels Against Wind Uplift and Vibration
In mobile homes, prefab structures, and modular units, the lightweight nature of the construction makes them particularly susceptible to wind uplift. Exposed fastener panels are vulnerable to loosening over time due to constant vibration from wind loads and thermal cycling. Once a fastener loosens even slightly, the rubber washer loses its compression, breaking the weather seal and allowing water to infiltrate the structure.
To mitigate this, fastener patterns must strictly follow engineering specifications for wind zones. This typically involves fastening every rib at the eave and rake edges (high-pressure zones) and at intermediate intervals (often every 12″ to 24″ on center) across the field. Skipping fasteners to save time compromises the diaphragm strength of the wall assembly, increasing the risk of panel detachment during severe weather events.
Ensuring Precision in Overlap and Alignment
Unlike vinyl or wood, metal siding does not forgive sloppy measurements. Misalignment in the first panel compounds exponentially across the wall, resulting in ill-fitting joints and compromised aesthetics. Proper installation requires that the first panel be perfectly squared and plumb, as it serves as the reference for the entire run.
When positioning sheets, the overlap direction is critical to water management. Side laps typically range from one to two corrugations and must always be oriented away from the prevailing wind direction to prevent wind-driven rain from being forced under the overlap. End laps (where panels meet vertically) must follow a “shingled” pattern, with the upper panel overlapping the lower panel to direct water downward, and require sealant application between the sheets to ensure a continuous barrier.
📋 Actionable Installation Steps
- Step 1: Position the First Panel. Set the first sheet at the bottom corner, ensuring it is level and plumb. Secure it loosely at the corners first to allow for minor adjustments before final fastening.
- Step 2: Fasten with Expansion Control. Drive fasteners into the pre-drilled ribs. Stop when the washer makes contact with the metal and the neoprene begins to flatten slightly. Do not drive the screw head deep into the panel.
- Step 3: Overlap and Align. Place the next panel so it overlaps the previous one according to the manufacturer’s rib specifications. Check that the ribs form a straight, continuous line. Fasten from the center outward to avoid trapping the material.
- Step 4: Trim and Seal. Cut the final panel of the row to fit using appropriate metal shears. Apply sealant to any top or side trim flashings where the panel terminates to ensure the envelope remains weather-tight.
Conclusion
Proper metal siding installation on a mobile home isn’t just about hanging panels — it’s about getting the weather barrier right, aligning panels level under wind load, and sealing every fastener point before moisture finds its way in. The DIY vs. pro cost comparison matters, but the real question is whether you want a 20-year finish or a 5-year callback. We’ve seen both outcomes on job sites across North America. Our engineering team has spent years troubleshooting installation failures on lightweight composite and insulated metal panel systems, and we’re happy to answer your early-stage design or technical questions — no purchase required, no obligation.
- Request our engineering team to review your project specs for free
- Ask about weather barrier compatibility with your climate zone
- Get guidance on starter strip alignment before breaking ground
Frequently Asked Questions
Which metal is best for mobile home siding?
Aluminum siding is lightweight and naturally rust-resistant, making it ideal for mobile homes. Galvanized steel offers greater strength at a slightly higher weight. Fiberglass-reinforced panels provide excellent corrosion resistance and impact durability, especially in harsh climates.
Can metal siding improve mobile home energy efficiency?
Metal siding alone provides limited insulation, but when combined with proper weather barriers and foam core insulation, it significantly improves thermal performance. Reflective coatings on metal panels can also reduce heat absorption, lowering cooling costs. RaxPanel foam core sandwich panels integrate insulation directly into the panel system for superior energy efficiency.
Tap the siding surface with a hammer or knuckle to listen for hollow sounds that indicate delamination or moisture trapped behind the panels. Inspect for discoloration, bubbling paint, or soft spots that suggest underlying rot or water intrusion. Fresh paint jobs on older mobile homes may conceal structural issues, so thorough inspection before replacement is essential.
How does thermal expansion affect metal siding?
Metal siding expands and contracts with temperature changes, which can cause panels to buckle or fasteners to loosen if not accounted for. Always leave a small gap at panel ends and edges to allow for movement. Avoid overtightening fasteners, as this restricts natural expansion and can lead to oil-canning or warping over time.
What wind rating should metal siding meet for mobile homes?
Metal siding for mobile homes should meet local wind-load codes, typically requiring resistance to at least 90–120 mph winds depending on your region. Properly spaced fasteners and reinforced edges significantly improve wind uplift performance. RaxPanel composite sandwich panels are engineered to withstand demanding environmental conditions while remaining lightweight for mobile home structures.
What fire rating do metal siding panels have?
Metal siding is non-combustible and typically carries a Class A fire rating, the highest available for exterior cladding. Foam core materials vary, so verify the fire rating of the specific panel core you select. RaxPanel offers PIR and rockwool core options that meet strict fire safety standards for mobile home applications.
How long does metal siding last on a mobile home?
Quality metal siding can last 30 to 50 years with proper installation and maintenance. Aluminum siding typically resists corrosion longer than steel in coastal environments. Regular inspections for loose fasteners, sealant degradation, and panel damage will extend the lifespan significantly.