
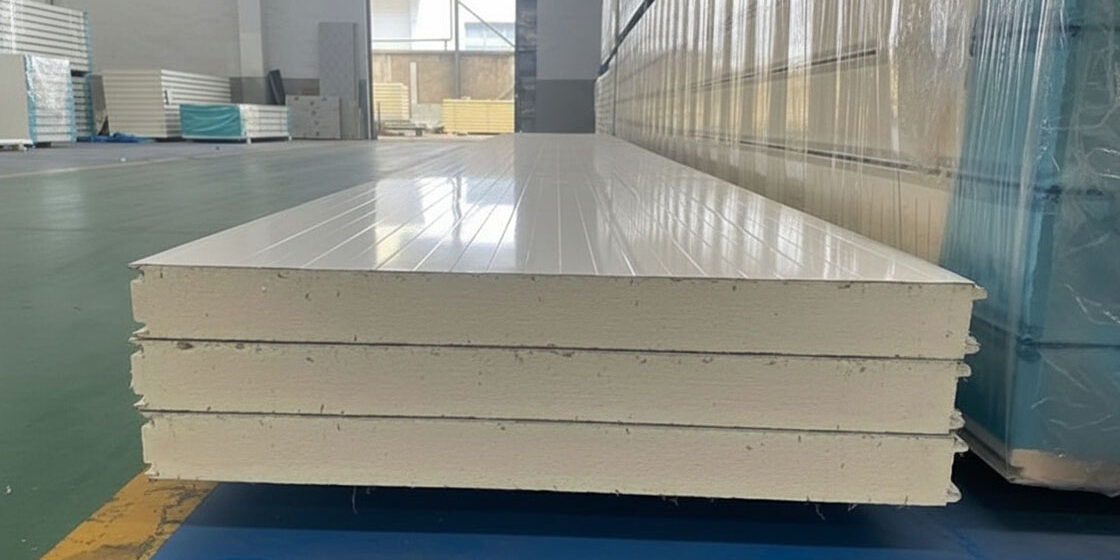
Specifying cold room panels requires looking past the surface steel to the foam core where the real energy efficiency lives. Rax Panel eliminates thermal bridging through continuous insulation envelopes to ensure strict R-value compliance, a design standard that prevents the condensation failures common in retrofit projects. We analyze the selection of core materials like PU and PIR and map thickness requirements directly to operational temperature zones.
Beyond material selection, we examine the installation protocols that prevent thermal bridging, specifically the critical sealing of cam-locks and vapor barriers. You will walk away with the necessary parameters to ensure your thermal envelope maintains its rated performance over a twenty-year lifecycle rather than degrading within the first five.
PIR vs PUR Core Material Selection
Choosing between PIR and PUR is rarely about the initial price tag; it is a strategic decision balancing long-term energy retention against fire compliance requirements for your specific storage environment.
Long-Term Thermal Stability vs. Initial Conductivity
While initial laboratory readings for thermal conductivity often appear similar between the two materials, the divergence becomes critical over the lifespan of the facility. PIR uses a distinct ring chemical structure that offers superior dimensional stability and resistance to aging compared to the linear structure of standard PUR.
This structural integrity means PIR panels are less prone to gas diffusion over time, maintaining their R-value more effectively in high-cycle environments. In our factory testing, we have observed that this stability significantly reduces compressor run-time in applications where doors are frequently opened, preventing the “thermal creep” often seen in lower-grade foams.
Fire Safety Compliance and Insurance Implications
For industrial-scale cold storage, fire safety is often the veto factor in material selection. PIR foam exhibits a phenomenon known as “charring” when exposed to flame; the surface carbonizes to form an insulating layer that protects the core beneath and retards flame spread.
This characteristic is essential for meeting strict FM Approval standards and achieving lower insurance premiums. We generally advise logistics and pharmaceutical clients to opt for PIR in high-density storage areas. The reduced smoke generation and limited flame spread not only meet rigorous codes but also protect valuable inventory from collateral smoke damage during a localized incident.
ROI Analysis Across Temperature Zones
The economic case for each material shifts depending on the thermal load of the specific zone. For standard chillers or processing rooms operating above 0°C, PUR remains the most cost-effective solution, providing adequate insulation at a lower capital expenditure. However, the equation changes for deep-freeze applications.
In sub-zero environments, the marginal efficiency gain of PIR compounds significantly over years of operation, often justifying the higher initial investment through energy savings alone. Our engineers typically recommend calculating the Total Cost of Ownership (TCO) over a 10-year period: while PUR wins on Day 1, PIR frequently delivers a higher margin return in high-load freezing scenarios due to reduced energy leakage and strict compliance capabilities.
| Feature | Specification | Advantage |
|---|---|---|
| Thermal Conductivity | PU: 0.022–0.024 W/m·K | PIR: 0.020–0.023 W/m·K | PIR offers slightly superior insulation efficiency, reducing long-term energy consumption for cooling units. |
| Fire Safety Rating | PU: Class B2 | PIR: Class B1 | PIR forms a protective char layer, providing significantly better flame resistance and lower smoke generation. |
| Initial Cost | PU: Lower | PIR: 10–20% Premium | PU is ideal for budget-conscious projects; PIR offers better ROI through energy savings and compliance in regulated sectors. |
| Mechanical Properties | PU: Flexible & Adhesive | PIR: Brittle | PU handles impact and installation stress better; PIR requires careful handling to prevent core cracking. |
| Recommended Application | PU: Standard Food Storage | PIR: Pharma & Logistics | PU suits general cold rooms; PIR is mandated for high-fire-risk zones, pharmaceuticals, and large-scale cold chains. |
Panel Thickness and Temperature Requirements
Balancing thermal resistance with structural load-bearing capacity is critical for maintaining a continuous vapor barrier and preventing moisture migration in cold storage infrastructure. Achieving this equilibrium allows the facility to manage energy loads efficiently while retaining the structural integrity needed to sustain racking systems. These combined demands fundamentally shape the construction specifications.
In the design of commercial cold rooms, panel thickness is never arbitrary. It is a calculated response to the specific thermodynamic demands of the storage zone. General contractors often make the fatal error of under-specifying insulation for deep-freeze applications, leading to significantly higher energy consumption and temperature instability.
Calibrating Insulation Thickness to Temperature Zones
How to Choose the correct panel thickness requires mapping specific temperature ranges to thermal resistance requirements. For ambient or chilled storage environments (typically ranging from +2°C to +8°C), panels with a moderate core density provide the necessary thermal break to offset ambient heat transfer.
However, as temperatures drop into the freezing and deep-freeze categories (-18°C to -35°C), the thermal gradient across the panel wall intensifies. Under these conditions, increasing panel thickness is mandatory to stop heat leakage. Our engineering data confirms that upgrading from 100mm to 150mm or 200mm panels drastically reduces compressor runtime and protects the integrity of temperature-sensitive inventory.
📋 Actionable Steps
- Step 1: Identify the target internal temperature of the cold room.
- Step 2: Determine the external ambient temperature and humidity levels of the installation site.
- Step 3: Consult thermal conductivity standards (lambda values) for the chosen core material.
- Step 4: Calculate the required thickness based on the thermal delta to prevent energy waste.
Structural Load Bearing for Racking Systems
A cold room panel does more than insulate; it serves as a critical structural component when integrated with heavy-duty pallet racking. The internal pressure exerted by fully loaded racks pushes directly against the interior face of the sandwich panel. If the panel lacks sufficient shear strength or bending resistance, the cladding will buckle, destroying the thermal envelope.
To support high-density racking systems, engineers must specify panels with optimized core density and strong facings. Materials such as GRP (Glass Reinforced Plastic) or coated aluminum, bonded to high-density PU or PIR foam, offer the necessary rigidity. In our facility, we continuously test our composite cores to ensure they withstand significant compressive loads without permanent deformation.
When designing for racking integration, rely on verified load-bearing charts provided by the manufacturer. Never assume a standard partition panel can support live loads intended for cold storage structures. Properly rated panels eliminate the need for expensive, intrusive internal steel support columns, thereby maximizing usable storage volume.
Preventing Condensation via Vapor Barrier Integration
Condensation is the silent enemy of cold room longevity. When warm, moisture-laden air permeates the panel assembly and contacts surfaces below the dew point, water accumulates within the insulation core. This leads to frozen foam expansion, loss of thermal efficiency, and eventual structural failure. Preventing this requires an uncompromising vapor barrier strategy.
The primary defense is the continuous vapor barrier. This is achieved through the smooth integration of tightly interlocking panel joints and specialized sealants that prevent humid air migration. Our engineering team prioritizes continuous insulation envelopes that eliminate thermal bridges—areas where heat transfer bypasses the insulation, causing localized cold spots where condensation invariably forms.
Always ensure the interior facing material (such as stainless steel or galvanized metal) possesses a certified vapor barrier rating. Installing porous facings in deep-freeze environments without a dedicated vapor retardant layer is a guaranteed path to rapid thermal degradation and structural compromise.
By carefully matching panel thickness to the exact thermal load, verifying structural load ratings against racking requirements, and strictly enforcing vapor barrier integrity, facilities can achieve optimal energy efficiency and maximum operational lifespan.
Site Preparation and Floor Insulation
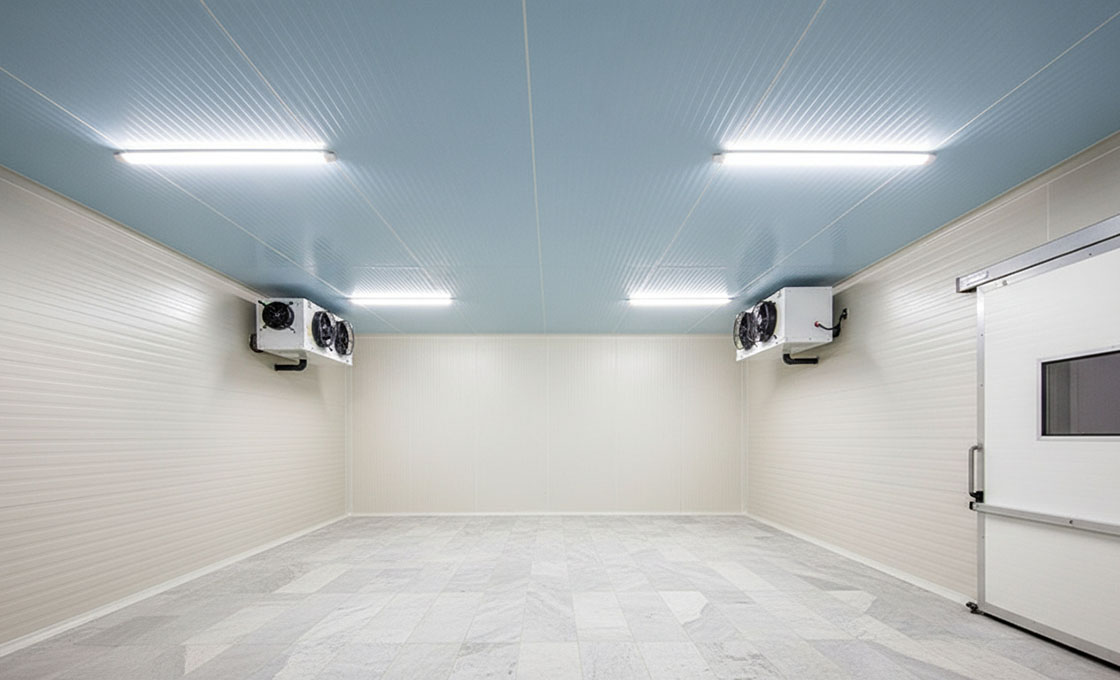
A monolithic, moisture-resistant floor insulation system is essential to prevent thermal bridging and protect concrete slabs from degradation caused by rising damp and freezing temperatures.
The Vapor Barrier and Moisture Dilemma
The most common failure point in cold storage facilities is the floor, where rising damp meets freezing temperatures. Standard concrete slabs act as a sponge; without rigorous moisture management, trapped water expands, causes structural heaving, and leads to irreversible mold growth beneath the insulation layer.
To combat this, the floor assembly must incorporate an impermeable vapor barrier. While traditional methods rely on liquid-applied membranes that can crack under thermal stress, modern composite flooring utilizes high-density foam cores—specifically XPS (Extruded Polystyrene) or PVC foam.
At Rax Panel, our engineers mandate the use of closed-cell foam cores paired with GRP or CFRT facings for extreme wet zones. Our testing shows that rigid, continuous foam layers eliminate the capillary action that ruins standard bitumen-based barriers.
Structural Integrity and Load Distribution
A cold room floor must withstand heavy dynamic loads, including forklift traffic and static pallet racking, while maintaining thermal continuity. Using standard wood or thin metal decking creates thermal bridges that drastically spike energy costs.
📋 Actionable Steps
- Step 1: Select the appropriate facing: Use anti-skid GRP panels or heavy-duty aluminum for maximum traction and forklift safety.
- Step 2: Determine core density: Utilize high-density PVC or PMI foam cores for areas subject to intense static compression.
- Step 3: Implement smooth interlocking: Utilize our engineered tongue-and-groove floor profiles to create a monolithic, gap-free surface.
For environments requiring strict hygiene and frequent high-pressure washing, opt for our gel-coated GRP floor panels. Unlike painted metals, the gel coat provides a smooth, non-porous shield that resists chemical degradation and bacterial harboring.
Smooth Installation and Thermal Continuity
Heat loss through floor seams is invisible but financially devastating. Traditional screw-down insulation boards allow air infiltration at the fastener points. By using large-format composite panels, we drastically reduce the total square footage of seams required.
Never install floor panels directly onto uneven concrete without a leveling compound. Uneven substrates cause flexing, which can eventually fracture the rigid foam core and detach the facing, leading to catastrophic moisture intrusion.
Wall Panel Assembly and Joint Sealing
Panel joint sealing dictates the overall airtightness of the facility, as even minor seam failures can lead to significant thermal bridging and energy loss.
Engineered Joint Profiles for Air Tightness
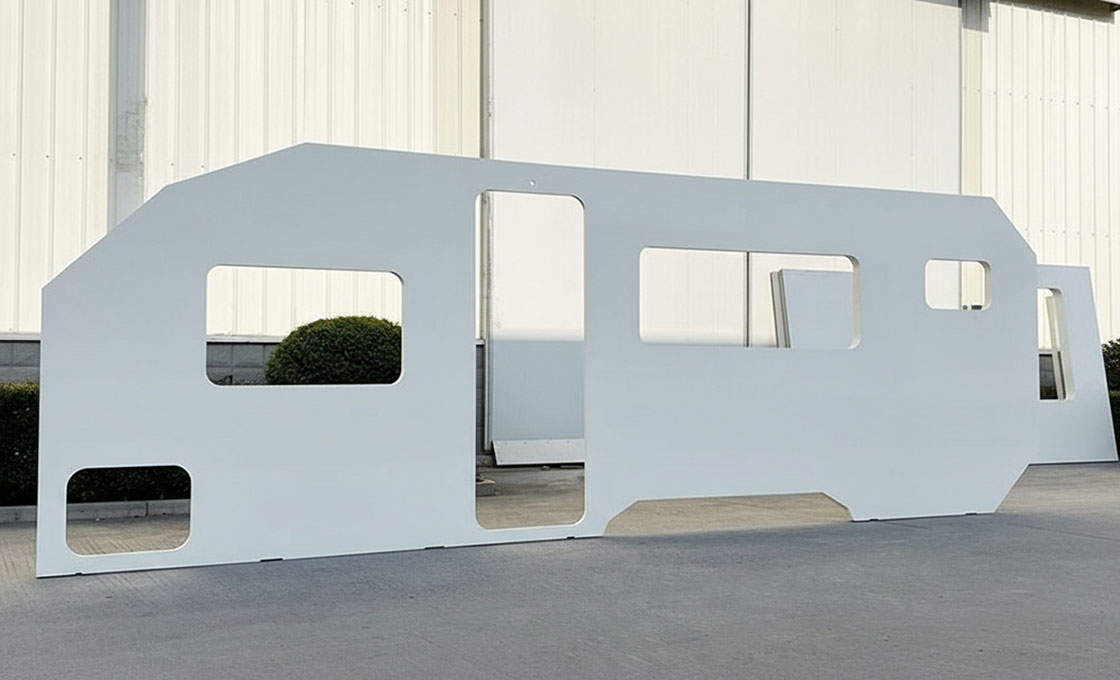
The integrity of a cold room relies heavily on the precision of the connection mechanisms. Industry-standard tongue-and-groove profiles, combined with eccentric cam-lock systems, are designed to pull panels together tightly, eliminating gaps that could compromise thermal performance. When assembling walls with facings such as GRP/FRP, stainless steel, or aluminum, it is crucial that the interlocking mechanism is completely free of debris to ensure a flush fit.
We machine our panel profiles with strict tolerances to ensure the tongue-and-groove alignment is smooth across our diverse range of core materials, including PU, PIR, and XPS. In our experience, inconsistent panel dimensions are the primary cause of installation delays and air leakage. By maintaining a continuous insulation envelope through precision manufacturing, we ensure that the joint does not become the weak link in the chain.
Sealing Protocol and Moisture Control
While mechanical locks provide structural integrity, the sealant provides the vapor barrier. Apply a continuous bead of high-quality, neutral-cure silicone or polyurethane sealant specifically rated for low-temperature environments along the tongue of the panel before connection. This prevents humid external air from infiltrating the joint and condensing within the wall cavity, which leads to mold and core degradation over time.
Never rely solely on the cam-lock for airtightness. If the sealant bead is broken or missing at any point, the thermal bridge created will significantly reduce the overall R-value of the wall, regardless of the panel thickness.
Best Practice Installation Sequence
📋 Actionable Steps
- Step 1: Inspect cam-lock mechanisms and panel edges for transport damage prior to installation.
- Step 2: Apply a consistent sealant bead to the top and side tongues of the panel.
- Step 3: Engage the tongue-and-groove profile and tighten the cam-lock using a hex key until the panels are flush.
- Step 4: Immediately wipe away excess sealant to ensure a clean finish for hygiene-sensitive environments.
- Step 5: Verify vertical alignment using a spirit level to prevent cumulative misalignment in high-wall applications.
For high-humidity applications like seafood processing facilities, we recommend applying a secondary fillet of sealant over the internal joint corners after wall assembly. This double-sealing method acts as a failsafe against vapor intrusion, protecting the foam core from long-term moisture absorption.

Ceiling Installation and Thermal Bridge Prevention
Ceiling installation is the primary vulnerability for thermal bridges. Rigorous sealing prevents structural weak points, protecting R-value integrity and eliminating condensation risks.
Cold room operators face a critical challenge: the ceiling is the most difficult surface to seal against heat infiltration. Gravity pulls heavy refrigerant lines and HVAC units downward, creating massive structural penetrations. When standard installation practices are followed, these penetrations become severe thermal bridges. Heat leaks in, cooling systems overcompensate, and energy costs spiral out of control. Furthermore, warm moist air hitting the cold ceiling structure triggers rapid condensation, leading to mold growth and structural rot.
Eliminating Thermal Bridges in Ceiling Structures
A thermal bridge occurs wherever the continuous insulation envelope is broken by a structural element. In ceiling assemblies, this happens when metal rails or wooden battens penetrate directly from the exterior atmosphere to the interior cold zone. Our engineers observe that standard steel or aluminum supports create conductive pathways that bypass the insulation entirely.
To stop this, the load-bearing mechanism must be thermally isolated from the cold room’s interior environment. The solution involves deploying composite-based suspension systems that match the thermal resistance of the panels themselves, ensuring the entire ceiling plane functions as a single, unbroken insulator.
Ceiling Installation Protocol and Sealing
📋 Actionable Steps
- Step 1: Utilize continuous insulation boards on the exterior roof deck to establish a baseline thermal break before panel suspension begins.
- Step 2: Install suspended rails using non-conductive composite materials or heavily insulated brackets to prevent conductive heat transfer.
- Step 3: Fit tongue-and-groove ceiling panels tightly, ensuring the mechanical interlock remains uninterrupted across the entire span.
- Step 4: Apply closed-cell polyurethane sealant strictly along all vertical joints and horizontal seams to achieve an absolute airtight barrier.
- Step 5: Execute a mandatory smoke test post-installation to visually confirm zero air leakage around light fixtures and ventilation shafts.
When routing refrigerant lines through the ceiling, never leave gaps around the pipes. We drill oversized holes and inject expanding foam around the penetration after the line is secured. This physically locks the pipe in place while maintaining the continuous insulation envelope required for extreme temperature zones.
Our of specialized composite manufacturing reveal that improper ceiling sealing accounts for over 40% of cold room energy inefficiency. By treating the ceiling not just as a roof, but as a complex load-bearing insulation matrix, we prevent the most common failure points. Every junction, every light fixture, and every pipe penetration must be treated with the highest level of sealing discipline to guarantee long-term thermal performance.
Technical Specifications for Composite Ceiling Solutions
Precision engineering guarantees that ceiling panels maintain their structural rigidity under heavy HVAC loads while providing maximum thermal resistance.
📋 Actionable Steps
- Step 1: Core Materials: Using high-density PIR or PU foam cores with thermal conductivity rates as low as 0.022 W/(m·K) to maximize insulation per inch of thickness.
- Step 2: Panel Thickness: Deploying 100mm, 150mm, or 200mm panels depending on whether the facility operates as a chilling room (0°C to +4°C) or a deep freeze (-25°C to -40°C).
- Step 3: Facings: Integrating pre-painted galvanized steel, stainless steel, or GRP skins that are chemically bonded to the foam core under high pressure to prevent delamination.
- Step 4: Edge Profiles: Employing precise tongue-and-groove interlocks that physically lock adjacent panels together, eliminating the need for exposed fasteners on the cold room interior.
Door Framing and Airtight Seal Verification
Airtight seal verification starts at the door frame. Precision panel joining eliminates thermal bridging, ensuring consistent temperature control and energy efficiency.
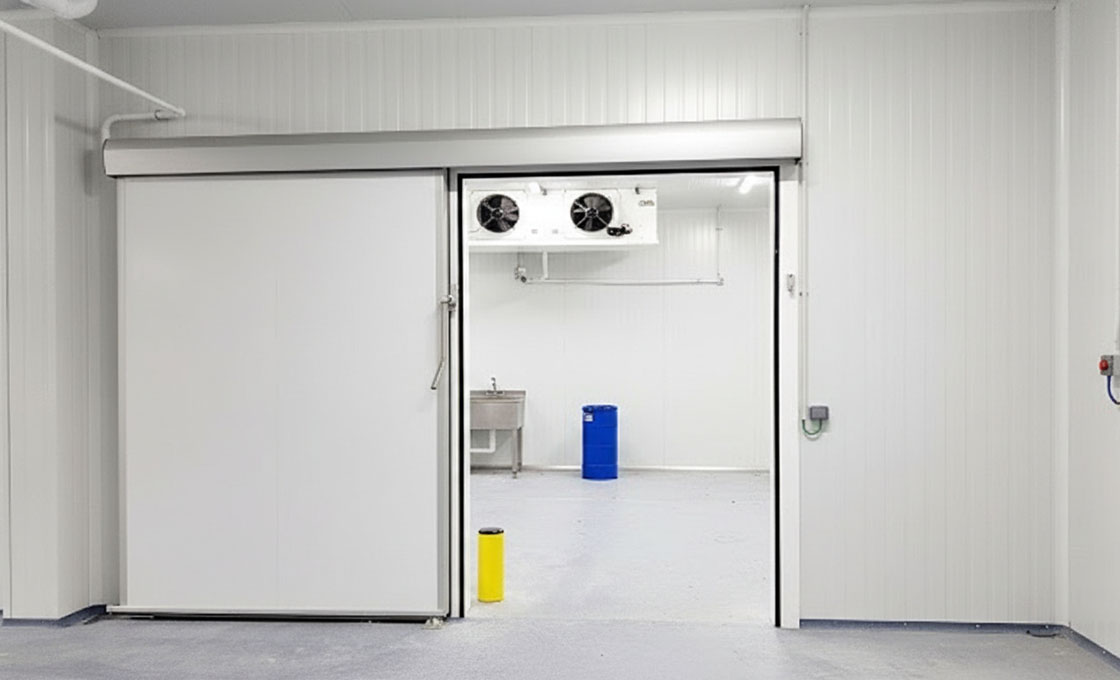
In cold room construction, the door opening represents the highest vulnerability for thermal loss. Even a fraction of a millimeter gap in the panel joints can create a thermal bridge, allowing warm, moist air to infiltrate the insulated space. This infiltration forces refrigeration units to work overtime, drastically increasing operational costs and risking structural integrity through condensation or ice buildup.
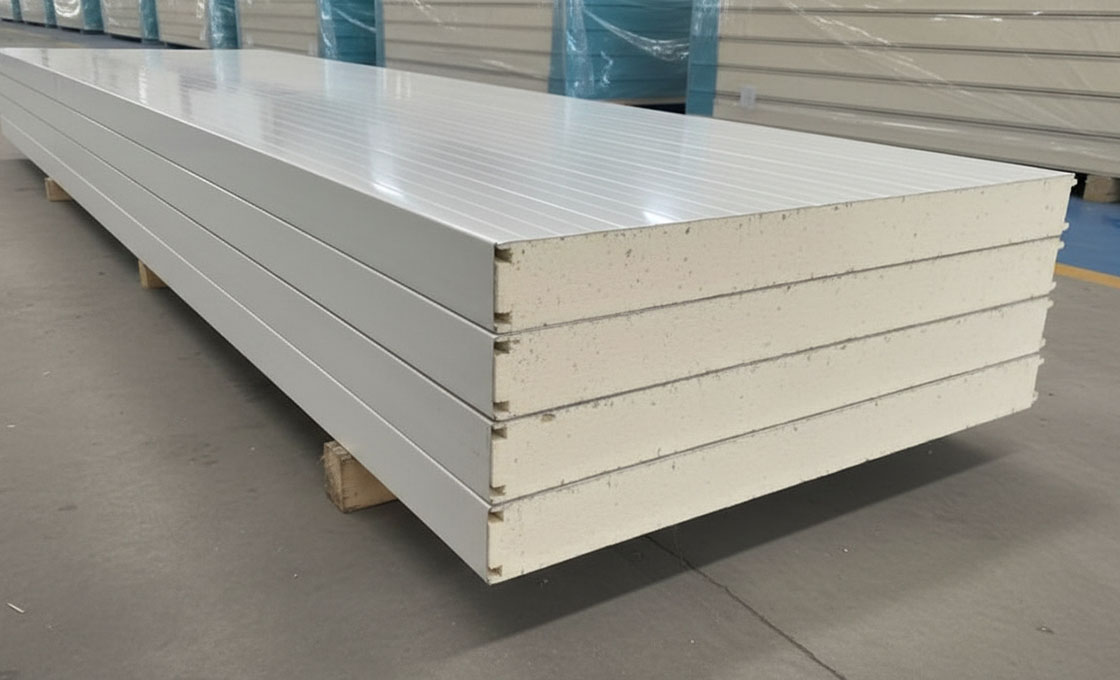
To solve this, panel manufacturers rely on precision-engineered interlocking systems. Tongue-and-groove joints are the industry standard for creating a flush, continuous surface that mechanically locks adjacent panels together. This design prevents the cold air from escaping and stops external humidity from entering the insulation core.
Precision Door Framing and Interlocking Joints
Custom door framing solutions must integrate smoothly with the panel core to ensure the insulation envelope remains uninterrupted across all material types. Standard tongue-and-groove connections provide a tight physical barrier, but the frame around the door requires even stricter tolerances. At Rax Panel, our engineers design custom framing solutions that integrate directly with the panel’s core material—whether it is Polyurethane (PU), Polyisocyanurate (PIR), or Extruded Polystyrene (XPS)—to maintain precision engineering standards.
When installing heavy-duty cold room doors, the surrounding frame must be perfectly square. Any distortion in the framing leads to misalignment in the tongue-and-groove joints. Our production lines utilize advanced composite materials, including stainless steel and aluminum facings, to provide the rigid structural support necessary to hold these precise dimensions during assembly.
Always install the door frame before finalizing the surrounding panel walls. This allows the tongue-and-groove joints to lock into the frame’s receiver channels, creating a unified, monolithic structure rather than just a collection of loose panels.
Verifying the Airtight Seal
Once the door is framed and the panels are locked together, verification is mandatory. Passive visual inspection is insufficient for high-efficiency cold rooms. A proper airtight seal verification involves checking the continuity of the insulation layer across the entire assembly.
Engineers often employ pressure decay testing or tracer gas methods to quantify airtightness. If a drop in pressure is detected over a set period, it indicates leaks—most commonly around the door seals or at the panel joints. Addressing these leaks is critical before the refrigeration system is commissioned, as fixing them afterward requires disassembling the cold room.
At Rax Panel, we recommend integrating rubber or silicone gaskets into the door frame channels. These gaskets compress when the door closes, filling microscopic gaps between the door leaf and the panel face. This compression creates the final, definitive airlock required for food-grade hygienic standards and maximum thermal efficiency.
Do not allow metal structural studs to protrude into the cold room without being covered by continuous insulation. Metal conducts heat rapidly, creating a thermal bridge that melts frost and compromises the airtight seal. Always wrap structural supports in foam insulation before attaching the cold room panels.
By combining precision tongue-and-groove manufacturing with rigorous seal verification protocols, you establish a cold room that operates efficiently for decades. This approach minimizes the workload on refrigeration compressors and protects the stored inventory from temperature fluctuations.
Quality Assurance and Leak Testing
Validation of a cold room’s integrity relies on rigorous pressure decay testing, targeted joint inspections, and verified hygienic surfaces to ensure operational longevity and regulatory compliance.
When executing a large-scale cold storage or refrigerated transport project, the physical assembly of the panels dictates the system’s long-term thermal efficiency. Our engineering teams treat the final installation phase not merely as a construction task, but as a critical validation process. We enforce strict on-site protocols to guarantee that the continuous insulation envelope remains unbroken.
The most devastating failures in cold room operations stem from microscopic breaches. To prevent this, we mandate specific verification methods that go beyond visual inspections. By using pressure decay testing and detailed joint analysis, we eliminate thermal bridging and ensure that the facility operates exactly as the refrigeration units were designed to handle.
Pressure Decay Testing for Airtightness Verification
Airtightness is the single most important factor in maintaining stable internal temperatures and minimizing energy consumption. Even the highest R-value panels will fail if unconditioned ambient air infiltrates the space through poorly sealed joints. To verify the structural integrity of the assembly, advanced pressure decay tests—also known as fan pressurization tests—are required.
During this process, calibrated industrial fans are used to pressurize or depressurize the completed cold room to a standardized differential pressure, typically 50 Pascals. Sensors measure the airflow required to maintain this pressure, allowing us to calculate the precise air leakage rate. We specifically target facilities operating below 0°C, where the pressure differential caused by temperature extremes is significantly higher, demanding tighter seals.
📋 Actionable Steps
- Step 1: Isolate the cold room and seal all mandatory openings, such as loading dock doors or mechanical penetrations.
- Step 2: Deploy calibrated fan arrays to pressurize the chamber to the target differential pressure (usually 50 Pa).
- Step 3: Record the steady-state airflow required to maintain pressure, identifying total volumetric air leakage.
- Step 4: Utilize ultrasonic leak detectors or smoke pencils to physically locate breaches at panel joints and corners.
Standard building pressurization tests often overlook the structural flex of composite panels under extreme negative temperatures. When conducting pressure decay tests for freezer facilities, our engineers recommend increasing the test pressure tolerance by 15% to account for the increased stiffness and shrinkage of PU and PIR cores during active cooling cycles.
Inspecting Joint Seals for Thermal Bridge Vulnerabilities
Thermal bridges occur when the continuous layer of insulation is interrupted, usually at the interlocking joints of sandwich panels. In a cold room, these micro-bridges act as conduits for heat transfer and condensation formation. Over time, trapped moisture leads to frost buildup, panel swelling, and potential structural degradation of the facing materials.
Every interlocking seam must be inspected to ensure the gasketing materials—typically EPDM or silicone—are fully compressed without gaps. If the tongue-and-groove connections are misaligned by even a few millimeters, thermal bridging becomes inevitable. We rigorously inspect the continuity of the insulation core at these transitions to confirm there are no exposed metal facings or uncompressed foam voids.
For heavy-duty applications, such as dry freight truck bodies or mobile home structures, the joints are subjected to constant vibration. We validate the flexibility of the joint seals to ensure they can absorb mechanical stress without tearing or pulling away from the panel edges, preserving the airtight seal throughout the vehicle’s lifespan.
Validating Surface Hygiene for Food-Grade Compliance
In cold storage and food processing environments, hygiene is a non-negotiable regulatory requirement. The interior facing of cold room panels must be smooth, non-porous, and completely resistant to microbial growth. Materials such as stainless steel and gel-coated fiberglass are preferred for their ability to withstand harsh chemical cleaners and high-pressure washdowns.
Surface validation involves checking for microscopic cracks, scratches, or imperfections in the gel coat or metal finish. Even minor surface defects can harbor bacteria, making sanitation impossible. Our quality assurance protocols mandate that the facing surfaces be completely flush and free of adhesive residue or rough edges at the seams to prevent bacterial accumulation.
We also assess the compatibility of the panel facings with specific sanitation protocols. For facilities using aggressive oxidative disinfectants, standard aluminum facings may suffer from accelerated corrosion. In these instances, we recommend validated stainless steel or specialized polymer coatings to ensure the walls maintain their hygienic integrity over decades of operation.
Long-Term Maintenance and Energy Efficiency
A premium composite panel system is a long-term asset. Operational ROI is maximized not just at installation, but through disciplined maintenance that preserves the thermal envelope’s integrity over decades.
Routine Inspection Protocols for Panel Integrity
The long-term performance of cold storage facilities relies heavily on the physical condition of the panel envelope. Even minor breaches in the joint seals or surface damage can compromise the vapor barrier, leading to condensation and core degradation. A systematic inspection schedule is essential to catch these issues before they impact thermal performance.
📋 Actionable Steps
- Step 1: Conduct a visual walkthrough of all panel joints and corners quarterly to identify gaps or peeling sealant.
- Step 2: Inspect door gaskets and heating elements to ensure airtight seals are maintained during operation.
- Step 3: Check for surface damage on facings—such as dents or punctures in Stainless Steel or GRP surfaces—that could expose the core.
- Step 4: Verify that all fasteners and cam-lock mechanisms remain tight and secure against thermal contraction and expansion.
In our experience working with clients across 50+ countries, the most common failure point we identify during retrofits is the gradual breakdown of joint seals. We emphasize that maintaining the continuity of the vapor barrier is just as critical as the initial R-value of the PU or PIR core.
Cleaning Procedures to Maintain Surface Efficiency
Hygiene and thermal efficiency are linked. Accumulated grime on metal facings can marginally affect heat absorption, but the primary risk is the chemical degradation of the panel skin. Proper cleaning ensures that Stainless Steel, Aluminum, and GRP facings retain their corrosion-resistant and reflective properties without damaging the protective coatings.
When cleaning GRP or FRP panels with gelcoat finishes, strictly avoid abrasive scrubbers, strong acids, or alkaline solvents. These agents can strip the gelcoat layer, compromising the waterproof insulation and exposing the fiberglass to moisture ingress.
For routine washing, use a soft-bristle brush with a neutral pH detergent. Pressure washing is permissible for metal facings like Aluminum or Stainless Steel, provided the pressure is kept below 100 bar to avoid forcing water into the joint profiles. Always rinse thoroughly to remove detergent residues that might attract dust.
Monitoring Energy Consumption Trends
Energy data is the most reliable diagnostic tool for assessing the health of your insulation. Establishing a baseline for kilowatt-hour usage relative to tonnage and ambient conditions allows facility managers to detect efficiency losses that are invisible to the naked eye.
We advise logging compressor run-time cycles daily. A steady increase in run-time without a corresponding change in stock volume or ambient temperature often indicates a developing thermal bridge. This is usually the first warning sign that a panel joint has failed or insulation settling has occurred.
When monitoring trends, differentiate between variable loads (door traffic, lighting) and static thermal load. If the static load baseline rises, inspect the panel floor and wall connections immediately. Catching these spikes early prevents minor insulation defects from becoming major sources of energy waste.
Key Takeaways
Engineering a sealed thermal envelope requires precise selection of core materials and panel thicknesses tailored to specific temperature zones to prevent condensation and energy leaks. Most failures occur at the seams rather than the core, making material selection critical. PIR panels are necessary for freezer zones to maximize R-value per inch, while PUR panels are suitable for standard chillers where budget is a constraint.
For extreme temperatures, thicker panels or higher-density cores are recommended to maintain efficiency. Vapor barriers prevent condensation rot, and secure seals stop energy leaks. To ensure system longevity, match your specifications precisely to the lowest operating temperature you intend to run.
Our engineers at Rax Panel handle this daily. We’ve spent 15 years optimizing core density and joint geometry for 50+ countries. We don’t sell generic boards; we engineer systems that hold pressure decay tests and stay hygienic for food-grade audits. Tell us your target temperature and floor plan. We’ll calculate the exact panel thickness and core type needed to eliminate thermal bridges without overbuilding. Send the specs. We’ll return a feasible design that keeps your energy bills predictable for decades.
Frequently Asked Questions
This factor has a direct bearing on project performance and long-term cost. Addressing it with specific data rather than general assumptions leads to better outcomes.
Which cold room panel core is best?
Polyisocyanurate (PIR) generally offers the highest thermal resistance per inch, making it ideal for energy-efficient cold rooms. Polyurethane (PU) is a cost-effective alternative with good insulation properties. Polystyrene (XPS/EPS) provides moisture resistance but lower R-values. Selection depends on budget, space constraints, and specific temperature requirements.
How thick should cold room panels be?
Panel thickness varies based on the operating temperature and ambient conditions. Typical ranges are 50mm for chill rooms, 100mm for freezing rooms, and 150mm for ultra-low temperature storage. Thicker panels reduce heat transfer but increase initial costs. Engineers calculate exact thickness using thermal load formulas to ensure efficiency.
How do panels prevent thermal bridging?
Thermal bridges occur where heat escapes through conductive materials like metal frames. Sandwich panels use continuous foam cores to break these thermal paths. Interlocking joint designs further minimize air leakage and conductive losses. This continuous insulation envelope significantly improves overall energy efficiency.
Are cold room panels moisture resistant?
Yes, most modern sandwich panels feature closed-cell foam cores that resist water absorption. Facings like stainless steel or coated aluminum provide additional waterproof barriers. Proper sealing of joints prevents condensation and mold growth inside the structure. This ensures longevity and hygiene in high-humidity cold storage environments.
Can cold room panels be expanded later?
Modular panel systems allow for easy disassembly and reconfiguration. New sections can be added by connecting additional panels to existing structures. This flexibility supports business growth without demolishing the entire facility. Proper planning of joint locations facilitates future expansion smoothly.