
The container home market has split into two camps: developers who treat structural engineering as an afterthought, and those who front-load it. At RaxPanel, we’ve seen the difference on every project we review. The builds that pass inspection on the first attempt share one thing in common — they never cut a single opening without an engineered reinforcement plan already in hand.
Cutting openings for windows and doors compromises the container’s load-bearing frame, and without proper reinforcement, deflection issues surface months after occupancy. This is the single most common field failure we document, and it’s entirely preventable when the engineering phase happens before fabrication begins rather than after.
This walkthrough covers the full construction sequence from permit strategy through final finishes, with particular focus on how to engineer structural modifications before they become change orders and how to select insulation materials before they become moisture problems. By the end, you’ll know exactly what to specify and what to flag with your supplier before the containers leave the yard.
Is a Container Home Right for Your Project?
Container homes are a viable option for projects that prioritize speed, cost efficiency, and design flexibility—provided the site conditions, climate demands, and budget align with the unique engineering requirements of steel modular construction.
Understanding Container Home Structural Basics
At their core, shipping container homes are built around Corten steel frames originally engineered to withstand the extreme stresses of global maritime shipping. The corrugated wall panels act as both the structural skin and the primary load-bearing element, creating a rigid box-like framework that can be stacked, cut, and reconfigured with precision.
Every standard container features reinforced corner castings at each of its eight corners. These steel fittings are the critical connection points where lifting, stacking, and structural integration happen. When multiple containers are combined, the corner castings allow for bolted or welded connections that transfer loads efficiently between units—essentially turning individual shipping boxes into a unified structural system.
One of the defining characteristics of container home engineering is that the walls themselves are structural. Unlike traditional timber-framed buildings where the exterior cladding is purely cosmetic, cutting openings in a container’s corrugated walls for windows or doors removes load-bearing material. This means any modification requires a structural engineer to design steel reinforcement—typically using I-beams or channel framing around the new openings to redistribute the load back into the remaining frame.
The standard dimensions that drive most container home designs come from ISO specifications. A 20-foot container provides approximately 160 square feet of interior space, while a 40-foot unit offers roughly 320 square feet. These modular dimensions create a natural grid that simplifies floor planning but also imposes constraints—open-span interiors are limited unless interior load-bearing walls or steel beams are introduced.
Evaluating Site and Climate Suitability Factors
Site selection is one of the most decisive factors in determining whether a container home is the right fit. The steel construction that makes these homes durable also makes them highly conductive to temperature changes, which means climate plays a larger role than it does with traditional wood-framed homes.
In hot and humid climates, thermal bridging becomes a significant concern. Steel conducts heat and cold far more efficiently than wood or concrete, meaning that without proper insulation and thermal break systems, container homes can experience substantial energy loss and interior condensation issues. The key is ensuring the insulation strategy is designed from the outset—not added as an afterthought—and that vapor barriers are correctly positioned to prevent moisture accumulation within the wall assembly.
Wind and seismic considerations also vary by region. Container homes perform exceptionally well in high-wind zones due to their inherent structural rigidity and low center of gravity, especially when properly anchored to a foundation. In seismic zones, the lightweight nature of steel construction can be an advantage, as it reduces the inertial forces experienced during an earthquake compared to heavier masonry or concrete structures.
Site accessibility deserves equal attention. While container homes are celebrated for their modularity, each unit is heavy—a 40-foot high-cube container can weigh between 8,000 and 9,000 pounds empty. The delivery site must accommodate crane or heavy-lift truck access, and the foundation must be prepared to receive the unit before it arrives. Remote or difficult-to-access sites can significantly increase logistics costs and may offset some of the inherent savings of container construction.
- Soil conditions: Container homes require a stable, level foundation. Poor soil conditions such as expansive clay or high water tables may necessitate additional foundation engineering, increasing costs.
- Slope and grading: Steeply sloped sites can complicate delivery and may require cut-and-fill work or pile foundations, which add expense and timeline.
- Climate zone: Extreme temperature ranges demand more robust insulation strategies. Hot climates require thermal break systems; cold climates need high R-value insulation and careful vapor barrier placement.
- Wind and seismic ratings: Coastal and earthquake-prone regions require specific anchoring and structural reinforcement details that should be addressed during the engineering phase.
Comparing Container Homes to Traditional Construction Methods
The comparison between container homes and traditional stick-built construction is not a simple question of which is better—it depends entirely on project priorities, local conditions, and the specific requirements of the build.
From a timeline perspective, container homes offer a distinct advantage. The structural shell arrives on-site ready for modification, which eliminates the months-long process of framing, sheathing, and weatherproofing that defines traditional construction. On-site work focuses on cutting, welding, insulation, and finishing—compressing the overall schedule significantly, particularly for projects in remote locations where material delivery chains are longer.
Cost dynamics are more nuanced. The container itself represents a relatively inexpensive structural starting point, but the total cost of a finished container home often converges with traditional construction once modifications, insulation, structural reinforcement, and finishing are accounted for. The savings come from reduced on-site labor time and fewer material handling steps, not from the raw materials being dramatically cheaper.
Design flexibility is another key differentiator. Traditional construction allows for virtually unlimited floor plans and custom dimensions from the ground up. Container homes work within the constraints of standard module sizes, though creative stacking, cutting, and combination techniques can achieve highly customized results. The most successful container home projects are those where the design embraces the modular logic rather than fighting against it.
Sustainability considerations favor container homes in most scenarios. Repurposing an existing shipping container avoids the environmental cost of producing new structural materials. However, the insulation and finishing materials required to make a container habitable can add significant embodied energy to the project. A full lifecycle assessment should consider both the reuse benefit and the materials required for conversion.
- Timeline: Container homes typically reduce on-site construction time by 30 to 50 percent compared to traditional methods, primarily because the structural envelope is pre-fabricated.
- Cost: While the base container is inexpensive, finished costs per square foot often match traditional construction once modifications and insulation are included. Savings are realized through labor reduction, not material costs.
- Design flexibility: Traditional construction offers unlimited customization; container homes require working within module constraints, though creative design can achieve highly distinctive results.
- Sustainability: Container reuse provides a clear environmental benefit, but insulation and finishing requirements must be carefully managed to maintain the sustainability advantage.
Assessing Budget and Timeline Feasibility
Budget planning for a container home project requires understanding where costs concentrate. The structural shell—the container itself—is only one component. A significant portion of the budget typically goes toward site preparation, foundation work, structural modifications, insulation systems, and interior finishing.
Site preparation and foundation costs can vary widely depending on terrain and access. A simple gravel pad may suffice for a single-unit installation on flat, well-drained land. Multi-unit projects, elevated designs, or builds on challenging terrain will require more substantial foundation work, which can represent a meaningful portion of the total budget.
Structural modifications are another cost driver that novices often underestimate. Every cut made into a container’s steel frame requires engineering and reinforcement. Large open-plan designs that remove interior walls or create expansive glazing require more extensive steel beam installation than layouts that preserve the container’s original structural integrity. Budgeting for engineering fees and reinforcement materials early in the process prevents costly surprises.
Timeline feasibility depends heavily on the project’s complexity and local regulatory environment. A simple single-container studio on an already-prepared site with favorable permitting can move from order to occupancy in a matter of months. More complex multi-unit projects, especially those requiring significant structural engineering or navigating uncertain permitting processes, can extend timelines considerably.
- Base container cost: A used 40-foot container typically ranges from $3,000 to $6,000, while new units cost more. This is only the starting point of total project cost.
- Site and foundation: Costs vary dramatically by site conditions. Simple pads may cost a fraction of what pile foundations or extensive earthwork require.
- Structural modifications: Engineering fees and steel reinforcement for cuts and openings can add thousands to the budget, depending on the scope of modifications.
- Insulation and finishing: High-performance insulation and interior finishing are essential for habitability and represent a substantial portion of the total budget in most projects.
The bottom line is that container homes are a strong fit for projects that value speed and modularity, have suitable site conditions, and plan their budgets holistically from the start. They are less ideal for projects that demand unlimited design customization, are located in extreme climates without robust insulation planning, or have tight budgets that cannot accommodate the full scope of conversion work. A realistic assessment of these factors early in the decision process is the best way to determine whether a container home aligns with your project’s goals.
| Structure Type | Customization Capability | Environmental Resilience | Assembly Profile | Operational Fit |
|---|---|---|---|---|
| Detachable Container System | High (Variable frame dimensions and composite panel integration) | High (Integrated perimeter drainage and sealing systems) | Bolt-on modular assembly | Projects requiring complex architectural customization |
| Flat-Pack Container System | Moderate (Standard frame with material finish flexibility) | High (Optimized roof pitch for water management) | Kit-based on-site erection | Deployment in wet and climatic zones |
| Folding Container Unit | Low (Fixed geometry for transport optimization) | Standard (Engineered for high-cycle transport durability) | Mechanical deployment (10 min cycle) | Temporary facilities and frequent relocation |
| Expandable Container Module | Moderate (Pre-engineered expansion limits) | Standard (Residential-grade envelope protocols) | Hydraulic/manual expansion | Rapid occupancy and space expansion |
| Standard ISO Shipping Module | High (Unlimited modification potential with engineering) | High (Structural steel; requires added insulation layer) | Crane lifting and structural welding | Permanent multi-story and hybrid builds |

Plan the Engineering and Secure Permits
Container homes are subject to the same rigorous structural and safety standards as traditional stick-built housing. Success depends entirely on professional engineering stamps and strict adherence to local zoning codes before construction begins.
Engaging Structural Engineers for Modifications
One of the most persistent myths in the container home industry is that the steel structure is indestructible. In reality, a shipping container derives its strength from the “corrugated” steel skin acting as a unified diaphragm. When you cut openings for windows or doors, you disrupt this structural integrity and significantly reduce the container’s ability to handle wind, snow, and seismic loads. A professional structural engineer is not optional; they are essential to calculate the new load paths.
Engineers analyze how proposed cuts affect the corner posts and roof bows, which are the primary vertical and structural support elements. For large openings, the engineer will specify the required reinforcement, typically involving steel tube sections or welded I-beams to transfer loads around the opening. This is particularly critical for multi-story builds where the cumulative weight requires precise calculations. Without these specifications, the structure risks collapsing under load or twisting during extreme weather events.
Never rely on “rule of thumb” reinforcement found in online forums. Structural modifications must be accompanied by stamped calculations signed by a licensed professional in your jurisdiction, or your permit application will be rejected immediately.
A shipping container home is legally treated as a permanent dwelling, not a temporary structure. This means it must comply with all applicable zoning ordinances and building codes, just like a conventional house. The first hurdle is zoning, which dictates where a container home can be placed. Local planning departments often restrict container homes to specific zones (such as industrial or rural areas) or may classify them under specific “Accessory Dwelling Unit” (ADU) regulations.
Building codes focus on safety and habitability. You must demonstrate compliance with standards for fire safety, energy efficiency, and structural integrity. This includes verifying that the insulation assembly meets the required R-value for the climate zone and that wall assemblies possess the correct fire-resistance ratings. Many municipalities also have specific aesthetic requirements, such as mandating exterior cladding to hide the industrial container appearance, ensuring the project fits the character of the neighborhood.
- Setbacks and Height Limits: Verify local requirements for distance from property lines and maximum building height, especially if stacking containers.
- Utility Hookups: Confirm zoning allows for standard utility connections (water, sewer, electricity) for the proposed lot.
- Seismic and Wind Loads: In areas prone to earthquakes or hurricanes, the engineering must meet specific high-wind or seismic design categories.
Preparing Engineering Drawings and Permit Applications
The permit application is a paperwork battle that requires precision. You cannot submit a simple sketch or a 3D rendering; building departments require detailed, scaled architectural and structural drawings. These documents, typically prepared by an architect or designer in collaboration with the structural engineer, serve as the blueprint for inspections and compliance.
The application package must include site plans showing the container’s location relative to property lines, floor plans detailing interior layouts, and elevation drawings showing exterior finishes. Crucially, it must include “structural calculation sheets” that prove the steel frame—and any modifications like cut-outs or roof extensions—can support the required loads. If the foundation design is unconventional (e.g., using screw piles instead of concrete footings), detailed engineering data for those elements is also required to prove they meet the bearing capacity of the soil.
Include a dedicated “Exterior Wall Assembly” detail in your drawings. Clearly label the layers (e.g., steel framing, insulation type, vapor barrier, sheathing, cladding). This preemptively answers the fire marshal’s questions regarding flame spread and fire ratings.
Coordinating with Municipal Authorities for Approvals
Once the application is submitted, the “plan check” process begins. A municipal plan checker will review the submissions for compliance with local and state codes. For container homes, this phase often involves scrutiny of non-standard elements. Be prepared for “correction notices”—requests for additional information or revisions. Common requests include details on how the steel containers are anchored to the foundation or proof that the insulation materials meet local fire safety codes.
Proactive communication can significantly shorten this timeline. Establishing a relationship with the plan checker allows you to clarify their concerns quickly. It is often beneficial to schedule a pre-application meeting, especially for complex multi-container projects, to identify major red flags before investing in full architectural drawings. Remember that the goal of the authorities is not to hinder progress but to ensure the building is safe for occupancy.
How to Choose the Right Shipping Container
Selecting the right shipping container is a structural engineering decision first and an aesthetic choice second. Prioritize ISO compliance, structural integrity, and thermal break compatibility over surface-level aesthetics to ensure long-term code compliance.
Vetting Container Manufacturers and Quality Certifications
For commercial projects, sourcing containers from reputable manufacturers is non-negotiable. The global supply chain contains varying tiers of quality, and a sub-par “one-trip” container can have structural inconsistencies that complicate modification engineering. Procurement officers must verify that units comply with ISO 668 and ISO 1496 standards, which dictate dimensional tolerances and structural strength. If a unit does not align with these strict tolerances, your composite panel cladding and structural reinforcements will not fit correctly, leading to costly rework and installation delays.
Always demand to see the CSC (Convention for Safe Containers) plate. This plate certifies that the unit is safe for handling and stacking in international transport. Beyond the plate, physically inspect the steel composition. High-quality containers utilize Cor-Ten steel (weathering steel) which provides superior corrosion resistance compared to standard mild steel used by budget fabricators. We advise our partners to avoid units with excessive patch repairs or dented corner posts, as these areas are critical load-bearing nodes that compromise the structural envelope when you stack units or apply external cladding loads.
Selecting Appropriate Container Dimensions and Configurations
The choice between 20ft and 40ft configurations extends beyond mere square footage; it dictates the complexity of structural reinforcement required. While a 40ft container offers more open space, its longer side rails are significantly more prone to mid-span deflection. In our engineering assessments, 40ft units often require additional steel reinforcement beams along the sides if you plan to cut large openings for windows or remove sections of the wall. A 20ft container, being more compact, inherently offers higher rigidity with less reinforcement, making it a cost-effective choice for modular office units or single-room residential layouts where strict dimensional control is required.
Configuration selection also impacts your mechanical systems. High Cube units, with their additional foot of vertical height, are essential for projects that require substantial HVAC ducting, plumbing runs, or deep insulation layers to meet strict energy codes. However, be aware that raising the center of gravity in a High Cube configuration necessitates a more rigorous wind-load analysis during the foundation and stacking phase. Do not select a configuration based solely on interior volume; calculate the total load weight of the container plus the composite cladding and wet systems to ensure your foundation design is not underspecified.
Evaluating Insulation Material Options for Thermal Performance
The steel skin of a shipping container is a thermal bridge; it conducts heat rapidly. If you simply line the interior with standard insulation, the steel frame will still transfer significant temperature differences, leading to condensation, mold growth, and energy loss. To achieve the high R-values required for commercial building codes, you must specify an insulation strategy that decouples the interior from the steel skin. Traditional methods like spray foam are popular but can be messy and inconsistent in application thickness, leading to thermal gaps.
Modern composite sandwich panels provide a superior solution by integrating the insulation core with structural skins that act as a thermal break. When evaluating options, look for materials with low thermal conductivity, typically measured in W/m·K. For example, rigid foams like PU (Polyurethane) offer excellent insulation properties but must be treated with fire-retardant additives. We have observed that projects utilizing composite panels with a PU or PET core provide a more consistent thermal envelope compared to batt insulation, which often settles over time and leaves voids around the complex corrugated geometry of container walls.
Reviewing Core Material Specifications and Facing Options
The specific core material you select dictates not just thermal performance, but also fire compliance and structural integrity. For B2B developments, you cannot overlook fire safety. Mineral wool cores offer an A2 non-combustible rating, which is critical for high-rise or multi-unit commercial complexes, though they are denser and heavier than foam alternatives. Conversely, foam cores like XPS or PET provide excellent lightweight insulation (ideal for transport logistics) but typically carry a B1 or B2 fire rating. You must balance the local building code requirements for fire spread against the weight savings needed for the foundation and transport.
Facing materials are equally critical for durability. Exterior facings must withstand UV exposure and impact, while interior facings need to handle moisture and abrasion. GRP (Glass Reinforced Plastic) facings are highly effective for exterior applications due to their gelcoat finish, which provides a waterproof, UV-resistant barrier without the need for frequent painting. For interiors, selecting a facing with high tensile strength ensures the wall system can resist impact damage. In our R&D tests, CFRT (Continuous Fiber Reinforced Thermoplastic) facings have shown exceptional resilience against impact, offering a lighter, thinner alternative to traditional metal sheets while maintaining high structural rigidity—ideal for vehicle conversions or high-traffic modular units.
- Fire Rating Compliance: Always verify if the jurisdiction requires Class A (non-combustible) materials. If so, Mineral Wool is the superior choice despite its weight.
- Moisture Resistance: In humid climates, XPS and PU foam cores resist water absorption better than open-cell options, preventing R-value degradation over time.
- Weight-to-Strength Ratio: For mobile or relocatable container units, Honeycomb cores (PP or Fiberglass) offer high stiffness with minimal weight, reducing transportation fuel costs significantly.
| Container Type | Dimensions | Key Properties | Best Application | Structural Notes |
|---|---|---|---|---|
| Standard Dry Cargo (20ft) | 20′ × 8′ × 8’6″ (6.1m × 2.4m × 2.6m) | ISO 668 compliant, Cor-Ten steel walls, marine-grade plywood flooring, 28,300 kg payload | Modular housing units, secure storage foundations, single-room offices | High rigidity due to square geometry; corner castings facilitate multi-level stacking; minimal mid-span deflection |
| Standard Dry Cargo (40ft) | 40′ × 8′ × 8’6″ (12.2m × 2.4m × 2.6m) | ISO 668 compliant, Cor-Ten steel walls, marine-grade plywood flooring, 26,630 kg payload | Multi-unit residential layouts, commercial complexes, modular office spaces | Longer span increases mid-section deflection; steel reinforcement beams required for large side openings |
| High Cube (20ft / 40ft) | 20’/40′ × 8′ × 9’6″ (6.1m/12.2m × 2.4m × 2.9m) | ISO 668 compliant, 30cm additional height, Cor-Ten steel walls, standard corner castings | Residential units requiring ceiling clearance, HVAC integration, enhanced volumetric efficiency | Maintains ISO load-bearing standards; increased center of gravity requires careful wind-load analysis for stacking |
| Refrigerated (Reefer) | 20’/40′ × 8′ × 8’6″ (6.1m/12.2m × 2.4m × 2.6m) | Integrated polyurethane foam core, stainless steel interior, T-bar aluminum floor, watertight seals | Cold storage conversions, climate-controlled facilities, high thermal performance baseline builds | Floor structure limits cutting options; modifications compromise sandwich panel integrity; aluminum floor requires thermal bridging mitigation |
| Open Top | 20’/40′ × 8′ × 8’6″ (6.1m/12.2m × 2.4m × 2.6m) | Removable PVC tarp roof, steel bow roof arches, swing header, corrugated steel walls | Industrial equipment housing, projects requiring overhead crane access, architectural exposure | Absence of fixed roof reduces torsional rigidity; top side rails require reinforcement after modification |
| Flat Rack | 20’/40′ × 8′ × 8’6″ (6.1m/12.2m × 2.4m × 2.6m) | Collapsible end walls, flatbed steel platform, no side walls/roof, high load concentration rating | Custom architectural frameworks, bridge structures, heavy industrial platforms, open-frame designs | Corner posts are primary structural elements; requires extensive secondary steelwork and cladding for habitable use |
Preparing the Site and Choosing a Foundation
The foundation choice directly determines the lifespan of a container home. Steel containers sitting on a poorly planned base will corrode from the inside out — a problem that can cut a home’s structural life from 50+ years down to 15.
Shipping container homes carry a unique structural challenge that traditional timber-frame houses do not: the entire load rests on or within the corrugated steel walls. This means the foundation must manage both vertical load distribution and long-term moisture exposure. The two most common approaches — concrete piers and slab-on-grade — each solve these problems differently, and choosing incorrectly creates compounding issues that show up years after construction.
Site Preparation: The First 48 Hours Determine Everything
Before any foundation is poured, the site itself must be properly assessed and prepared. The two variables that matter most are soil bearing capacity and surface water drainage. A site that looks flat may actually shed water toward where the container will sit, creating a persistent moisture trap at the steel-to-foundation interface.
- Soil testing: A basic percolation and bearing capacity test costs between $500 and $1,500. This tells you whether the ground can support concentrated point loads (piers) or requires a distributed load (slab). Ignoring this step is the single most common mistake — soft clay soils can compress 25 to 50 millimeters under a container’s corner load, causing structural frame distortion.
- Clearing and grading: Remove all organic topsoil, vegetation, and root matter from the build footprint. Organic material decomposes over time, creating voids that lead to uneven settling. Grade the site to maintain a minimum 2% slope (approximately 1/4 inch per foot) away from the future container placement point.
- Utility marking: Before any excavation, call your local utility locating service. Hitting a gas line or electrical conduit during pier hole digging is not just dangerous — it can delay the entire project by weeks and void insurance coverage.
Concrete Pier Foundation: Best for Moisture-Prone Sites
Concrete piers are individual cylindrical columns of poured concrete, typically 12 to 18 inches in diameter and 24 to 48 inches deep, placed at strategic load points beneath the container’s corner castings and mid-span locations. The container sits on steel or concrete pedestals mounted on top of these piers, creating a crawl space beneath the home.
This elevated approach is the preferred choice for sites with poor drainage, high water tables, or expansive clay soils. By lifting the container 12 to 24 inches above grade, you eliminate direct contact between the steel bottom rails and moist ground. The air gap beneath the home also provides natural ventilation, which dramatically reduces the risk of condensation forming on the underside of the container floor — a frequent source of hidden rot and mold in poorly ventilated installations.
- Cost range: $3,000 to $8,000 for a standard single-container home, depending on soil conditions and pier depth required.
- Installation timeline: 3 to 5 days for site preparation, pouring, and curing to initial load-bearing strength.
- Ideal for: Sloped lots, flood-prone areas, sites with high water tables, and regions with freeze-thaw cycles where ground heave is a concern.
- Corrosion protection advantage: The elevated design allows the entire steel perimeter to remain dry and inspectable. This is the single most effective passive strategy against bottom-rail corrosion, which accounts for an estimated 60% of premature container home structural failures.
Slab-on-Grade Foundation: Simplicity with Hidden Moisture Risks
A concrete slab-on-grade is a single monolithic pour of concrete, typically 4 to 6 inches thick, spread across the entire footprint of the container home. This is the most common foundation type for traditional site-built homes, and it works well for container homes — but only when the site has excellent drainage and low moisture risk.
The primary advantage is cost and speed. A slab eliminates the need for individual pier calculations and can be poured in a single day. However, the slab creates a direct thermal and moisture bridge between the ground and the container floor. Without proper intervention, ground moisture will wick upward through the concrete and condense on the cooler interior surface of the container floor — a process that can saturate flooring materials and create mold conditions inside the living space.
- Cost range: $4,000 to $10,000 for a standard single-container footprint, including vapor barrier and reinforcement.
- Installation timeline: 2 to 3 days including prep, pouring, and initial cure.
- Mandatory moisture barrier: A 6-mil polyethylene vapor barrier must be installed beneath the concrete slab. This is non-negotiable — skipping it on a slab foundation is the fastest path to interior moisture damage.
- Thermal bridging concern: Concrete conducts heat at approximately 1.0 W/(m·K), compared to insulated steel framing at 0.04 W/(m·K) or less. The slab edge where it meets the container wall becomes a significant thermal bridge. This area requires continuous exterior insulation to prevent condensation and heat loss.
Stem Wall Foundation: The Hybrid Option
A stem wall foundation combines the load-distribution benefits of a continuous concrete footing with elevated piers or columns that raise the container above ground level. This approach is essentially a reinforced concrete perimeter wall — typically 12 to 24 inches wide and 18 to 36 inches tall — topped with a grade beam that provides a level, stable mounting surface for the container.
This option is particularly relevant for container homes because it provides the elevation benefit of piers (moisture separation, ventilation, crawl space access) while offering the continuous load distribution of a slab (no point-load concentration on individual piers). It is the recommended foundation type for sites with moderate drainage issues where a full slab would be problematic but piers alone would not provide adequate lateral stability.
- Cost range: $6,000 to $14,000 for a standard single-container home, reflecting the additional concrete and rebar required compared to pier-only foundations.
- Installation timeline: 5 to 10 days, including footing excavation, rebar installation, forming, pouring, and curing.
- Structural advantage: The continuous stem wall provides superior lateral resistance against wind loads and seismic activity compared to isolated piers. This is a significant factor in coastal or earthquake-prone regions where container homes are increasingly popular.
- Ventilation access: The open space beneath a stem wall foundation allows for the same airflow benefits as a pier foundation, while the continuous concrete perimeter eliminates the risk of small animals or pests entering the crawl space through individual pier gaps.
Corrosion Protection: The Non-Negotiable Layer
Regardless of which foundation type you choose, the steel bottom rails of the shipping container require dedicated corrosion protection. Container steel is Corten-type weathering steel, which forms a protective oxide layer when exposed to the elements — but this protection breaks down in the constant damp, dark environment at the foundation interface. The result is accelerated corrosion that can eat through a 1/4-inch rail in as few as 7 to 10 years if left untreated.
- Bituminous coating: Apply a minimum 2-millimeter coat of bituminous paint to all steel surfaces that will contact or approach the foundation. This is the most cost-effective option at approximately $0.50 to $1.00 per square foot and provides 10 to 15 years of protection.
- Galvanized contact plates: Install galvanized steel plates between the container bottom rail and the foundation pedestal. These plates act as a sacrificial layer — the galvanization corrodes first, protecting the underlying container steel. Replacement is straightforward and costs approximately $150 to $300 per plate.
- Stainless steel shims: For the highest durability, use 304-grade stainless steel shims between the rail and the foundation. These will not corrode and provide a clean, non-contaminating interface that prevents galvanic corrosion between dissimilar metals.
Permit and Code Considerations
Foundation design for container homes is subject to the same building code requirements as any other structure in your jurisdiction. Most local building departments will require a stamped structural engineer’s drawing that specifies pier size, depth, spacing, and load capacity. The International Residential Code (IRC) and International Building Code (IBC) both contain provisions that apply to container-based construction, and your local amendments will determine the exact requirements.
- Flood zone requirements: If your site is in a designated flood zone, the foundation must elevate the lowest floor to or above the base flood elevation (BFE). This often means piers or stem walls must be 4 to 8 feet tall, significantly increasing cost and complexity.
- Seismic zones: In earthquake-prone areas, the foundation must resist both vertical and lateral forces. Stem wall foundations with reinforced concrete grade beams are typically preferred over isolated piers in these zones.
- Setback and zoning: Foundation dimensions count toward your lot’s impervious surface calculation. In some jurisdictions, exceeding a certain percentage of impervious cover triggers additional stormwater management requirements that can add $2,000 to $8,000 to the project.
The foundation is where a container home project either establishes decades of stability or plants the seeds of costly failure. The decision between piers, slab, and stem wall should be driven by site conditions — soil type, water table depth, flood risk, and climate — not by cost alone. A $2,000 savings on a slab foundation that later requires $15,000 in moisture remediation is not a savings at all.
How to Cut, Weld, and Stack Containers
Cutting, welding, and stacking shipping containers requires structural engineering oversight at every stage. Modifications disrupt the container’s load-bearing design, and improper reinforcement can compromise the entire building.
Cutting Openings: Understanding Structural Impact
Shipping containers are engineered as rigid steel boxes where the corrugated walls themselves distribute structural loads. When you cut openings for windows, doors, or pass-throughs, you sever these load paths. The container’s corner castings and frame rails were designed to carry the full weight of stacked units above. Removing sections of wall or floor without reinforcement redistributes that weight unpredictably, creating weak points that can lead to cracking, sagging, or catastrophic failure under load.
Before any cutting begins, a qualified structural engineer must evaluate the planned modifications. This is non-negotiable for multi-story builds where a single cut can affect the stability of the entire structure. The engineer will determine which walls can accept openings, what sizes are safe, and what reinforcement strategy is required.
- Structural walls vs. non-structural walls: End walls with corner castings are primary load-bearing elements. Cutting large openings in these walls requires significantly more reinforcement than cutting into side walls, which carry less vertical load.
- Opening size limits: Most engineers recommend keeping individual window or door openings under 4 feet in width for standard 8-foot-wide containers unless additional framing is installed.
- Cutting sequence matters: Remove material in controlled sections rather than large continuous cuts to minimize stress concentration on remaining steel.
DIY builders often cut large open-plan windows or remove entire wall sections without engineering input. This is the single most common cause of structural failure in container homes. Never assume a container wall can be cut freely—every modification changes how the unit carries weight.
Welding Steel Reinforcement for Load Distribution
Once cutting is complete, steel reinforcement must be welded around every opening to restore structural integrity. The standard approach is to frame each cutout with steel tube or channel that transfers the load around the opening and back into the container’s primary frame. This is not optional cosmetic work—it is the mechanism that keeps the building standing.
For window and door openings, a steel tube reinforcement frame is welded directly to the container’s existing structure. The frame must extend into the uncut steel on all sides, typically overlapping the original wall by at least 12 inches on each side of the opening. This ensures the load from above is redirected around the cutout and continues down through the corner castings and base frame.
- Corner casting welds: When stacking containers, the corner castings on the top unit must be welded or bolted to the corner castings of the unit below. This creates a continuous load path from the roof down to the foundation. Proper welding of corner castings requires clean metal preparation, correct electrode selection for corten steel, and inspection for full penetration.
- Reinforcement around large openings: For openings wider than 4 feet, additional vertical steel posts and horizontal header beams are welded to carry the accumulated load from the container above.
- Floor cutouts: Cutting into the container floor for stairways or interior access requires steel beam reinforcement across the opening, sized to carry the full design load of the floor above.
Always use corten-compatible welding consumables when working with weathering steel containers. Standard electrodes can create weak joints that rust prematurely. A certified welder familiar with corten steel will produce stronger, longer-lasting connections than a general-purpose welder.
Stacking Containers Safely for Multi-Story Builds
Stacking shipping containers vertically transforms them from single-unit structures into multi-story buildings. This introduces significant engineering complexity. The bottom container must support not only its own weight but also the weight of every container above it, plus live loads from occupancy, furniture, and roofing materials. A two-story stack can effectively double the load on the lower unit’s corner castings and frame.
Proper stacking requires a designed connection system between units. The most common method is welding the corner castings of the upper container directly to the corner castings of the lower container. This creates a rigid vertical connection that transfers loads efficiently. Alternatively, mechanical bolted connections using custom stacking kits can be used when welding is not desirable or permitted by local code.
- Foundation preparation: The foundation must be engineered to support the concentrated loads at each corner casting point. Standard concrete pier spacing must align precisely with the container’s corner casting locations, typically at 8-foot and 20-foot intervals for 20-foot and 40-foot containers.
- Alignment tolerance: Containers must be level within 1/8 inch per 10 feet before stacking. Misalignment creates uneven load distribution and puts harmful twisting forces on the corner casting connections.
- Seismic and wind considerations: In earthquake-prone or high-wind regions, additional lateral bracing between stacked containers is required. This typically involves welding steel plates or installing shear tabs between adjacent corner castings to resist horizontal forces.
- Maximum stack height: Most structural engineers limit container stacks to two or three units high without additional internal steel framing. Beyond that, the cumulative load on lower corner castings and frame rails approaches the yield strength of the steel.
Stacking containers without engineering calculations is like building a tower of books without checking the base. The visual simplicity of stacking steel boxes hides the complex physics of load transfer. Every multi-story container home requires stamped engineering drawings before construction begins—not just for safety, but for building permit approval in virtually all jurisdictions.
Integrated Workflow: From Cut to Stack
The most efficient and structurally sound approach follows a specific sequence. First, the structural engineer produces modified container drawings showing all planned cuts and reinforcement locations. Second, cutting is performed according to those drawings. Third, reinforcement frames are welded around every opening before the container is moved to its final position. Fourth, containers are stacked and corner castings are connected. Finally, all welds are inspected and treated for corrosion protection.
Reinforcing before stacking is critical. It is far easier and safer to weld reinforcement frames on a container sitting flat on the ground than to work at height after the unit has been lifted into position. Plan the entire modification sequence with your engineer and welding team before any cutting begins.
- Pre-cut planning: Map all window, door, and utility penetrations on the engineering drawings before the torch touches steel. Rearranging cuts after welding is expensive and structurally risky.
- Reinforcement-first welding: Install all steel tube frames around cuts while the container is on the ground. This ensures proper fit-up and weld quality.
- Post-stack inspection: After stacking and corner casting connection, have a structural inspector verify all welds and connections before proceeding with insulation and cladding.
Installing Insulation, Plumbing, and Electrical Systems
Successfully converting a shipping container requires prioritizing the order of operations: mechanical rough-ins must precede insulation, and steel-specific challenges like thermal bridging must be resolved to ensure structural longevity and energy efficiency.
Overcoming Thermal Bridging and Moisture Challenges
The single biggest enemy of a container home is not temperature, but condensation. Steel is a highly conductive material; without a proper thermal break, the interior steel will “sweat” when the outside temperature drops. This moisture accumulates in traditional insulation, leading to mold, rot, and eventual corrosion of the steel frame. To prevent this, builders must select insulation materials that provide a high R-value (thermal resistance) while acting as a vapor barrier.
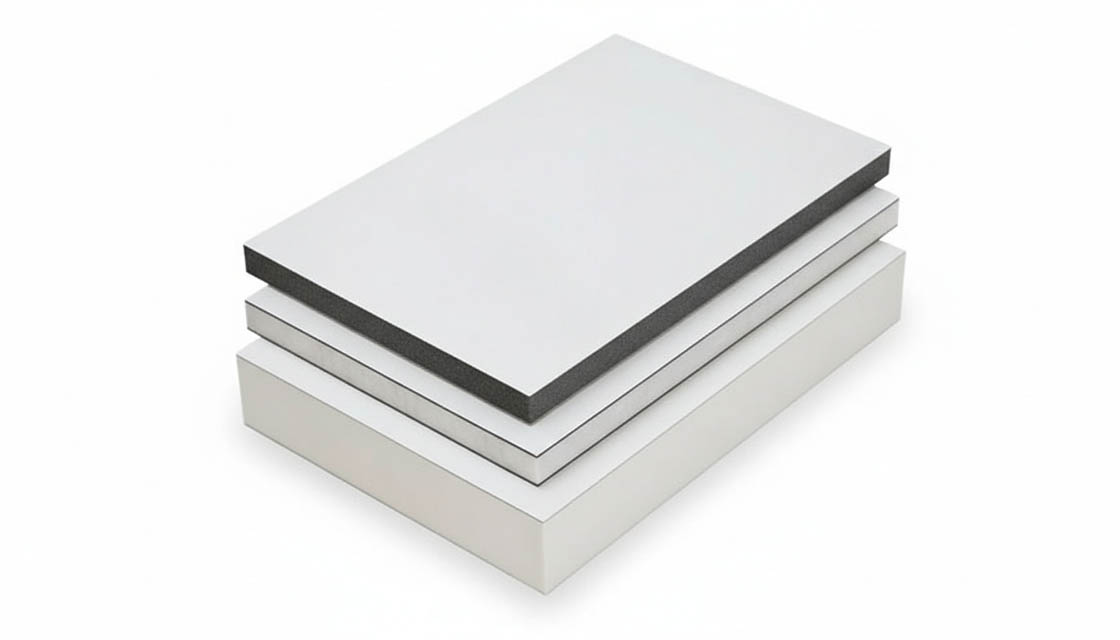
For modern builds, Closed-Cell Spray Foam is frequently utilized for its ability to expand into every crevice, creating an airtight seal that adheres directly to the steel ribs. However, for a lightweight and structurally integrated solution, advanced Sandwich Panels are increasingly preferred. These composite panels typically utilize cores such as XPS, PU, or PET foam, sandwiched between durable facings like GRP (Glass Reinforced Plastic) or aluminum.
Unlike traditional batt insulation which can absorb moisture and degrade, high-quality composite panels with closed-cell foam cores (like PU or PET) are inherently waterproof and resistant to thermal degradation. When selecting materials, verify that the facing material—such as GRP or CFRT—provides a continuous barrier to prevent moisture ingress, which protects the R-value of the assembly over the long term.
Electrical Rough-In and NEC Compliance
Running electrical wiring inside a steel box presents distinct safety challenges that standard wood-frame construction does not. Because the structure is conductive, grounding is paramount. Furthermore, you cannot simply staple non-metallic sheathed cable (Romex) to the interior steel walls; the sharp corrugated edges can cut through the insulation over time, creating a severe fire and shock hazard.
To comply with the National Electrical Code (NEC), wiring within a steel container must be protected by physical damage barriers. This is typically achieved using Rigid Metal Conduit (RMC), Electrical Metallic Tubing (EMT), or Flexible Metal Conduit (FMC). In dry, interior locations where corrosion is not a risk, EMT is often the most cost-effective choice. For areas requiring flexibility around corners, Liquidtight Flexible Non-Metallic Conduit (LFNC) is an approved alternative.
Plumbing Installation and Freeze Protection
Plumbing a container home involves routing supply and drain lines through the steel floor or ceiling corrugations. Due to the limited depth of standard container walls (typically only 50mm-70mm of clearance), interior wall plumbing is rarely feasible. Instead, supply lines are best run through the ceiling cavity or raised flooring.
PEX (Cross-linked Polyethylene) tubing is the industry standard for container homes. Unlike rigid copper or CPVC, PEX is flexible enough to snake through the steel framing without requiring multiple elbows and joints that are potential leak points. It also has the advantage of being slightly expandable, making it resistant to freeze-burst damage compared to rigid pipes—though insulation remains mandatory.
Drainage presents a challenge because cutting holes in the container floor reduces structural integrity and creates potential leak points. A common strategy is to build a raised platform or utilize a false ceiling in a two-story stack to route horizontal drains to a common wet wall. Regardless of the routing method, all pipes exposed to exterior cavity temperatures must be insulated with foam sleeves and, in colder climates, equipped with heat trace cables to prevent freezing.
- Supply Lines: Use PEX-A or PEX-B for flexibility; avoid threading through corrugations where possible to prevent pinching.
- Venting: Ensure proper venting for drains (AVM or Studor vents) to prevent trap siphonage, especially if routing horizontal runs is complex.
- Insulation: Apply closed-cell foam sleeves to all hot and cold water pipes to conserve energy and mitigate condensation.
Applying Interior Finishes and Exterior Cladding
Interior finishes and exterior cladding transform a raw steel container into a code-compliant, weatherproof living space. The key challenge is managing moisture and thermal bridging while creating flat, durable surfaces for finishes.
Interior Wall Substrates and Finish Systems
Container walls are corrugated steel, which presents a fundamental problem: you cannot directly attach drywall or paneling to an uneven, conductive metal surface. The solution is building a substrate layer that creates a flat plane while addressing moisture and thermal concerns simultaneously.
The most common approach uses vertical steel studs or wooden furring strips spaced 16 to 24 inches on center. These are fastened to the container’s structural ribs using self-tapping metal screws with neoprene washers that seal the penetration point. The cavity between the container wall and the substrate becomes the location for insulation, typically fiberglass batts, mineral wool, or rigid foam boards rated for the local climate zone.
A critical detail that many first-time builders miss is the vapor barrier placement. In cold climates, the vapor barrier must face the interior to prevent warm indoor air from reaching the cold steel surface and condensing. In hot humid climates, the strategy reverses—exterior weather barriers take priority to keep moisture out. A properly installed 6-mil polyethylene vapor barrier or a foil-faced rigid foam substrate addresses this directly.
- Substrate spacing: 16-inch or 24-inch on-center framing aligns with standard drywall and panel dimensions, reducing waste and labor time.
- Fastener selection: Self-tapping screws with EPDM washers create a sealed penetration that prevents water intrusion at each attachment point.
- Vapor barrier orientation: Climate-dependent placement prevents interstitial condensation, which causes corrosion and mold inside wall cavities.
Flooring Systems for Container Homes
The container floor is a flat steel plate, typically 3 to 5 millimeters thick, which is structurally sound but uncomfortable and thermally inefficient as a finished surface. A flooring system must decouple the finish material from the steel while providing a level substrate and accommodating any underfloor services.
The standard method involves a raised subfloor frame built from pressure-treated lumber or steel joists positioned between the container’s existing cross-members. This creates a cavity that can hold electrical conduits, plumbing lines, and insulation without reducing ceiling height on the floor below. The subfloor itself is typically 18-millimeter exterior-grade plywood or oriented strand board, fastened to the joists with construction adhesive and structural screws.
Moisture management under the floor is equally important. A damp-proof membrane or liquid-applied waterproofing layer applied directly to the steel floor plate prevents any residual moisture from wicking into the wood substrates. This is especially critical in ground-contact installations where capillary moisture rise is a persistent risk.
Exterior Cladding and Weatherproofing Layers
Bare corrugated steel looks industrial and offers no aesthetic appeal for residential or commercial applications. Exterior cladding addresses both appearance and protection, creating a layered weather barrier that shields the steel from UV degradation, rain, and mechanical damage.
The cladding system typically consists of three layers working together. The outermost layer is the visible cladding material—options include fiber cement boards, timber boards, metal panels, or composite sandwich panels. Behind that sits a weather-resistant barrier, usually a housewrap membrane or liquid-applied flashing, which allows water vapor to escape while blocking liquid water intrusion. The innermost layer is the continuous insulation wrap, which serves as both thermal protection and an air barrier.
The critical engineering principle here is the creation of a drained and vented rain screen cavity. By leaving a 10 to 20-millimeter air gap between the insulation layer and the outer cladding, any water that penetrates the outer layer can drain downward and exit through weep holes at the base. This cavity also promotes airflow that dries the assembly, preventing trapped moisture from reaching the steel container wall.
- Outer cladding: Fiber cement, timber, metal panels, or composite sandwich panels provide the finished appearance and initial weather shield.
- Weather-resistant barrier: Housewrap or liquid flashing membranes block water while permitting vapor diffusion.
- Rain screen cavity: A 10 to 20-millimeter ventilated air gap enables drainage and drying, protecting the steel shell from moisture damage.
Thermal Bridging and the Steel Conduction Problem
Steel conducts heat approximately 250 times faster than wood and 1,500 times faster than insulation materials. This means every point where the interior finish framing touches the steel container wall becomes a thermal bridge—a direct pathway for heat to escape in winter and enter in summer. Thermal bridging can reduce effective R-value by 30 to 50 percent if not properly addressed.
The most effective solution is continuous exterior insulation that completely wraps the container shell before any interior work begins. This approach eliminates thermal bridging by placing the insulation layer outside the structural steel, so the steel remains at a stable temperature within the conditioned envelope. Rigid foam boards or sandwich panels with foam cores installed as an exterior wrap achieve this continuous barrier.
When interior framing is necessary—for attaching finishes and running services—the framing members should be isolated from the steel using thermal break pads or rubberized washers at each contact point. This reduces but does not eliminate bridging at those specific locations, which is why exterior continuous insulation remains the preferred strategy for high-performance container homes.
Fire Rating Compliance in Wall Assemblies
Building codes in most jurisdictions require interior wall and ceiling finishes to meet specific fire resistance ratings. For residential container homes, this typically means Class A or Class B fire-rated materials for interior finishes, depending on the occupancy type and local amendments.
Type X gypsum board is the standard fire-rated interior finish, providing a one-hour fire resistance rating when installed in the recommended configuration. For areas requiring higher ratings, such as garages or utility rooms, multiple layers of Type X drywall or alternative fire-rated panel systems are specified. The exterior cladding materials also have fire rating requirements—fiber cement and metal panels typically achieve Class A ratings, while certain composite panels may require additional fire-rated backing materials.
It is essential to verify that the complete wall assembly—steel container, insulation, vapor barrier, substrate, and finish material—meets the fire rating specified by the local building code. An assembly that passes individual component tests may fail when combined, so consulting the manufacturer’s listing and the local authority having jurisdiction is necessary before finalizing the wall specification.
Practical Installation Sequence
The order of operations matters significantly for long-term performance. Exterior cladding and weatherproofing should be completed before interior finish work begins, establishing a sealed envelope that protects the interior workspace from weather exposure.
The recommended sequence starts with applying the exterior continuous insulation wrap and weather-resistant barrier to all container walls, including corners and penetrations, which are flashed and sealed with compatible tape or liquid flashing. The rain screen furring strips are then installed over the weather barrier, creating the ventilated cavity. The outer cladding material is attached to these furring strips, leaving the required air gap. Roof edges, window openings, and door penetrations are flashed and integrated with the weather barrier system before the cladding is finalized.
Once the exterior is sealed and weathertight, interior work proceeds with framing installation, vapor barrier placement, insulation insertion, and finally the interior finish materials. This sequence ensures that any moisture management systems are functioning correctly before the walls are closed in with permanent finishes.
📋 Actionable Steps
- Step 1: Apply continuous exterior insulation wrap and seal all seams with compatible flashing tape.
- Step 2: Install weather-resistant barrier over the insulation, flashing all penetrations and corners.
- Step 3: Attach rain screen furring strips to create the 10 to 20mm ventilated air cavity.
- Step 4: Install outer cladding material, integrating windows and doors with proper flashing details.
- Step 5: Complete exterior sealing and inspection before beginning any interior finish work.
Avoiding Common Container Home Mistakes
Shipping containers are engineered for cargo, not human habitation. The most costly mistakes—condensation, structural weakening, thermal bridging, and fire code failures—are all preventable with the right engineering discipline and material selection.
Preventing Condensation and Moisture Damage in Walls
A shipping container is essentially a sealed steel box. When warm, moisture-laden indoor air contacts the cold interior surface of corrugated steel, condensation forms—a process identical to water droplets appearing on a cold drink can on a humid day. Over time, this trapped moisture degrades insulation, promotes mold growth, and causes progressive steel corrosion that compromises wall integrity.
The primary mistake is assuming that spray foam insulation alone is sufficient to prevent condensation. While closed-cell spray foam provides a continuous air and moisture barrier with an R-value of approximately 6.5 per inch, it does not eliminate the need for a dedicated vapor control layer in many climate zones. In humid or cold climates, warm indoor air must be prevented from reaching the cold steel substrate. A continuous vapor barrier—typically a foil-faced barrier or a smart vapor retarder—installed on the warm side of the insulation cavity is essential.
Another frequent error involves the use of traditional foam core panels and GRP (glass-reinforced plastic) sandwich panels without assessing their long-term moisture behavior. Some foam cores, particularly open-cell or lower-density variants, can absorb ambient moisture over time. This absorption reduces the panel’s R-value and can lead to micro-cracking and delamination of the outer facings. When evaluating panel specifications, the water absorption rate should be a key criterion—materials rated for less than 1% water absorption by volume are significantly more suitable for long-term moisture exposure in container conversions.
- Air gap ventilation: Where climate conditions require a rainscreen cavity, a minimum 12mm ventilated air gap behind the interior lining allows any incidental moisture to escape before it reaches the steel.
To mitigate these moisture retention risks, implementing effective ventilation strategies is critical.
Beyond material selection, proper detailing is equally critical to managing moisture within wall assemblies. One of the most effective strategies involves incorporating ventilation pathways that actively mitigate trapped humidity.
Skipping the vapor barrier review during the design phase is one of the most expensive oversights in container home construction. Once interior finishes are installed, correcting a vapor barrier error requires stripping walls and re-insulation—often at 3 to 5 times the original cost.
Avoiding Structural Compromise During Container Cutting
The corrugated steel walls of shipping containers function as shear panels, distributing structural loads across the entire frame. Because these walls are integral to the container’s structural integrity, any modification requires careful engineering review before cutting begins.
The corrugations in container walls are not merely for rigidity; they function similarly to the flanges of an I-beam, carrying significant shear and bending forces. When a cut is made, those forces must be redirected around the opening through a properly sized steel lintel or frame. A common mistake is using undersized replacement framing—such as a 50mm x 50mm angle iron where a 100mm x 50mm channel is required—which creates a weak point that can lead to wall deformation under lateral loads or stacking weight.
This concern is amplified in multi-story container homes. When containers are stacked, the lower unit bears not only its own weight but the cumulative load of units above. Any structural weakening from improper cutting or inadequate reinforcement is magnified at each additional level. Structural engineers must calculate the required reinforcement for every opening based on the total stacked height, local wind and seismic loads, and the specific container grade (e.g., Corten steel vs. standard carbon steel).
- Lintel sizing: Steel lintels around cut openings must be engineered to carry the redistributed load; generic off-the-shelf framing is insufficient for openings wider than 600mm.
- Corner post preservation: The four corner posts are the primary load-transfer points in a container. Cutting or welding near these posts without reinforcement fundamentally undermines the stacking capacity and should never be done without structural approval.
- Multi-story implications: Each additional container level increases the load on lower-unit openings by approximately 2.8 to 3.2 metric tons per 40ft container; reinforcement specs must scale accordingly.
Always request a stamped structural drawing from a licensed engineer before any cutting begins. A drawing that accounts for your specific stacking configuration, local wind zone, and seismic category is non-negotiable for both safety and permit approval.
Addressing Thermal Bridging in Composite Panel Installations
Thermal bridging occurs when a highly conductive material—such as steel—creates a direct path for heat to flow through a building envelope, bypassing the insulation. In container homes, this is a pervasive issue. The steel frame of the container and the steel attachments used to mount interior composite panels are both excellent conductors of heat and cold, creating localized cold spots on interior surfaces where condensation is most likely to form.
The mistake here is often one of installation detail rather than material selection. A builder may choose a high-performance CFRT (cellulose fiber-reinforced thermoplastic) panel with excellent thermal resistance, but if that panel is fastened directly to the steel container frame without a thermal break, the steel fasteners and mounting brackets act as thermal bridges that can reduce the effective R-value of the wall assembly by 15% to 25% in cold climates.
The solution involves breaking the conductive path between the steel frame and the interior finish. This can be achieved through several methods: using insulated backing rails made from non-conductive materials, installing rubber or polymer thermal break washers at every steel-to-panel contact point, or employing a staggered stud framing system that separates the interior finish plane from the container wall by a continuous insulation layer. The specific approach depends on the panel system, climate zone, and required U-value of the finished assembly.
- Continuity of insulation: The insulation layer must be continuous across the entire wall assembly; gaps at corners, junctions, or around utilities create thermal bridges that undermine the rated performance of the panel.
- Panel-to-frame separation: Where possible, mount interior panels on a secondary framing system that is decoupled from the container steel, maintaining a consistent insulation layer between the two planes.
Beyond isolating individual components, the overall effectiveness of thermal bridging mitigation depends on maintaining an unbroken insulation layer throughout the assembly.
Ensuring Fire Safety Compliance in Wall Assemblies
Container homes must meet the same fire safety standards as traditional stick-built construction in virtually all jurisdictions. The steel shell itself is non-combustible, but the interior wall assemblies—including insulation, vapor barriers, and finish materials—can introduce significant fire risk if not specified and installed correctly. This is where many first-time builders encounter compliance failures during inspection.
The core concern is the fire rating of the complete wall assembly, not just individual components. A panel may carry a Class A fire rating in isolation, but when installed with combustible fasteners, adhesives, or backing materials, the as-built assembly may not meet the required fire resistance duration—typically 30 to 60 minutes depending on the building code, occupancy type, and proximity to property lines.
Another common oversight involves the fire performance of insulation materials. While closed-cell spray foam provides excellent thermal and moisture performance, some formulations require an approved thermal barrier—such as 12.7mm (½ inch) gypsum board—between the foam and the interior space to meet code. Skipping this barrier is a frequent cause of inspection failure. Similarly, foam core panels must be verified for flame spread and smoke development ratings that comply with the applicable building code, typically ASTM E84 or UL 723 testing standards.
- Smoke development index: All interior finish and insulation materials should have a smoke developed rating below 450 and a flame spread rating below 25 per ASTM E84 to meet most residential code requirements.
- Documentation for inspection: Maintain product data sheets, fire test reports, and manufacturer installation instructions for all wall assembly components; inspectors will request these during the framing and insulation phases.
In addition to flame spread requirements, insulation materials must also meet specific smoke development standards to ensure overall fire safety compliance.
To ensure this approved covering meets rigorous safety standards, specific fire performance metrics must be evaluated. Critical data points include the Smoke development index.
Engage your local building department early in the design phase. Fire code interpretations can vary between jurisdictions, and knowing the specific requirements before selecting materials prevents costly last-minute changes that delay project timelines and increase costs.
Conclusion
Building a container home that passes inspection and performs for decades comes down to three things: solid engineering on every cut and weld, the right insulation strategy that kills thermal bridging at the steel frame, and fire-rated assemblies that meet local code. Skipping any of those — even once — creates callbacks, failed inspections, and reputation damage. We’ve seen projects live or die on the R-value choices and the way composite panels interface with the container structure. Pick your materials based on climate zone and code requirements, not price alone. Your engineers should review every modification before steel hits the shop floor.
- Verify CFRT sandwich panel specifications against your region’s R-value and fire-rating requirements.
- Request a technical review from our engineering team on early-stage designs — no obligation, just a second set of eyes on your insulation and structural plans before you commit to production.
Executing this strategy effectively requires a deep focus on material performance, specifically regarding CFRT sandwich panels.
Frequently Asked Questions
Do lightweight panels reduce transport costs?
Yes, high-strength composite panels weigh significantly less than traditional concrete or wood alternatives. This reduction in dead weight lowers fuel consumption during logistics and simplifies on-site handling. Lighter materials also reduce the structural load requirements for the foundation.
How do sandwich panels stop thermal bridging?
Sandwich panels integrate insulation and structural facings into a single continuous unit, eliminating gaps found in traditional framing. This design prevents thermal transfer through steel studs. Continuous insulation layers maintain the thermal envelope’s integrity and improve energy efficiency.
Are composite sandwich panels waterproof?
Yes, facings like GRP or aluminum combined with closed-cell foam cores provide exceptional moisture resistance. Gel-coated finishes offer additional protection against water ingress and corrosion. This ensures the building envelope remains dry and thermally efficient over its lifespan.
Do composite panels accelerate construction timelines?
Prefabricated composite panels arrive ready to install, significantly reducing on-site assembly time compared to traditional stick-built methods. This rapid installation helps projects meet strict deadlines and reduces labor costs. The dimensional consistency of factory-made panels ensures a seamless fit.
Can composite panel dimensions be customized?
Manufacturers can produce panels in specific lengths and widths to minimize on-site waste and fit unique container designs. Custom sizing ensures structural continuity and optimizes material usage for the project. Engineering teams work directly with clients to verify load requirements for bespoke sizes.
What is the lifespan of composite panels?
High-quality composite panels are designed for durability, often exceeding 25 years with proper installation. UV-resistant gel coats and corrosion-resistant materials prevent degradation from harsh weather. This longevity reduces maintenance costs and ensures a stable return on investment.
How are bulk composite panels shipped internationally?
International shipments require reinforced wooden crates to prevent edge damage during ocean freight. We optimize container loading to maximize space and minimize transport costs. Proper packaging ensures materials arrive on site ready for immediate installation.